How to Do Chrome Nails at Home: Easy Step-by-Step Guide
Chrome nails have that shiny mirror look that can make even a simple manicure feel different. The good news is that you do not need a fancy setup to try them at home. Once you understand when to use the chrome powder, the process becomes much less confusing.
In this guide, I’ll show you how to get chrome nails at home, what products actually matter, how chrome powder works, and what to do when it looks patchy or refuses to stick. We’ll also cover regular polish, gel polish, UV lights, chrome French tips, removal, and a few easy tricks that make the final shine much better.
What Are Chrome Nails?
Chrome nails get their shiny finish from a very fine powder that is rubbed over the nail surface.
The powder is usually made from tiny particles that reflect light. When it is applied over the right top coat, it can create a smooth mirror-like finish.
Silver is the shade most people think of first. But chrome powder also comes in pink, gold, blue, green, purple, and other shades.
The final color depends on both the powder and the base underneath it. That is why your base color matters more than you might expect.
What You Need for Chrome Nails at Home
Before starting, gather everything you need. Working with chrome powder is much easier when you are not stopping every few minutes to look for something.
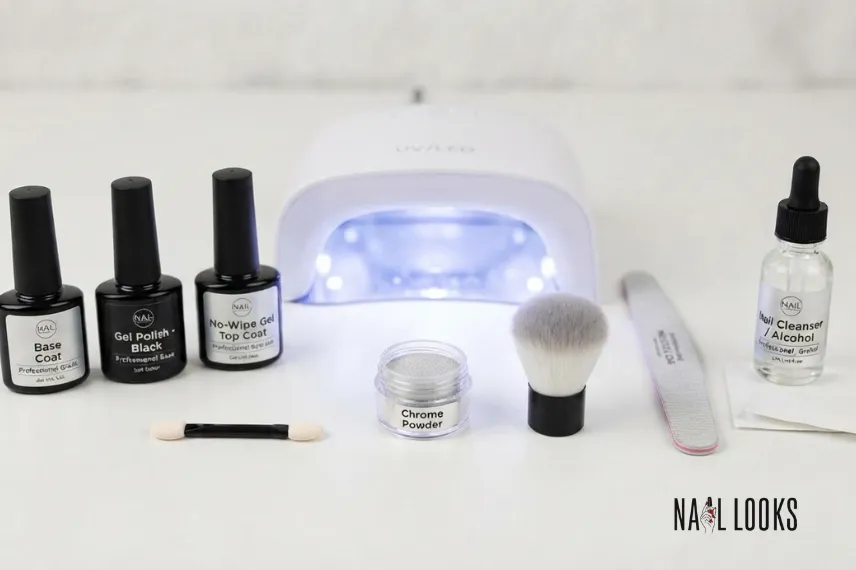
For a basic gel method, you will need:
- Base coat
- Gel polish
- A color for your base
- No-wipe gel top coat
- Chrome powder
- Small sponge applicator
- Soft brush for extra powder
- Nail file
- Nail cleanser or alcohol
- UV or LED nail lamp
The most important item is the no-wipe top coat.
Regular gel top coats often leave a sticky layer after curing. Chrome powder usually works best over a smooth no-wipe surface.
If you are using regular polish, the process is different. I will explain that method later because you cannot simply treat regular polish like gel.
How to Do Chrome Nails at Home With Gel
If you have gel polish plus a UV or LED lamp, this is usually the easiest way to get a strong chrome finish.
Step 1: Get Your Nails Ready
Start with clean nails.
File them into the shape you like. Almond, square, oval, or coffin can all work with chrome.
Make sure the nail surface is clean before applying polish. Any oil, dust, or leftover product can affect the finish.
Do not rush this part. A smooth base gives you a much better final result.
Step 2: Apply Your Base Coat
Apply a thin layer of gel base coat.
Cure it according to the instructions for your product. Different gel brands can have different curing times, so follow the label instead of guessing.
Keep the layer thin. Thick gel can cause problems later.

Step 3: Add Your Color
Now apply your chosen gel color.
Black is a popular base for silver chrome because it gives the powder a strong, dark background. White can make chrome look softer and brighter.
Nude, pink, blue, or even red can change the final look too.
Apply one thin coat first. Cure it fully. Add another coat if the color needs more coverage.
Step 4: Apply a No-Wipe Top Coat
This is where the chrome magic starts.
Apply a thin layer of no-wipe gel top coat over the colored nail.
Make sure the whole nail is covered. Avoid leaving dry spots near the sides.
Cure it according to the product instructions.
The surface should now feel smooth. There should not be a sticky layer left on top.
That smooth surface is what lets the chrome powder spread evenly.
Step 5: Apply the Chrome Powder
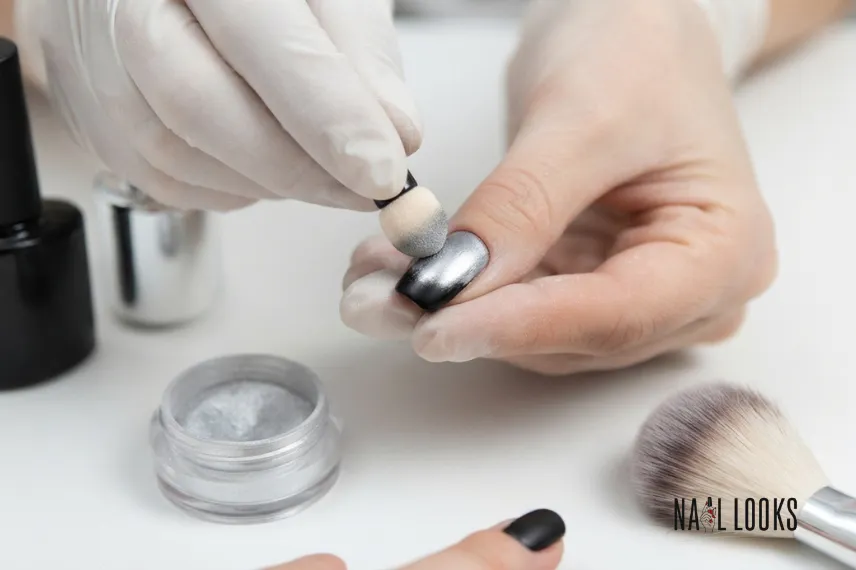
Take a tiny amount of chrome powder on your sponge applicator.
Rub it gently over the nail using small back-and-forth movements.
You should see the powder start turning into a shiny metallic finish. Keep rubbing until the surface looks smooth.
You do not need a thick layer of powder. A little can go a surprisingly long way.
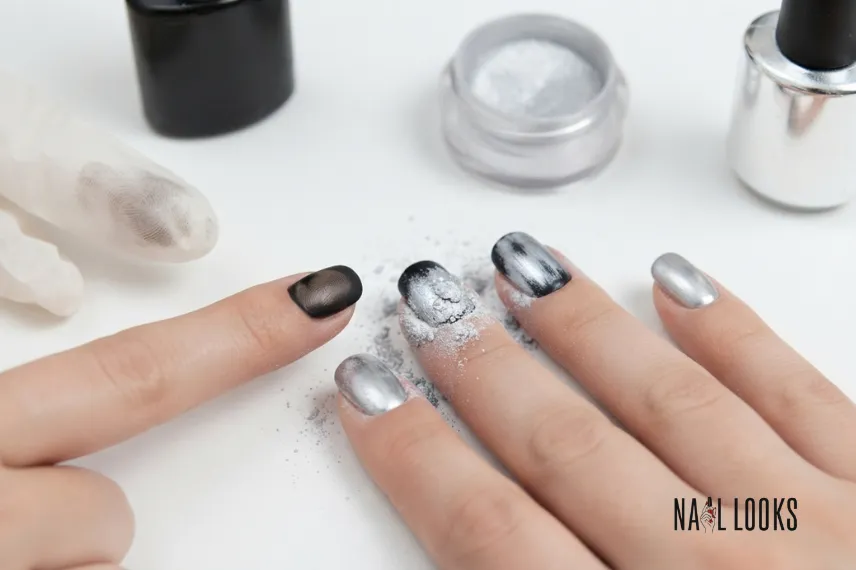
This is one reason chrome powder can be messy. Tiny bits can get everywhere, so work over a clean surface.
Step 6: Brush Away Extra Powder
Once you have the shine you want, use a soft brush to remove loose powder.
Pay attention to the sides of the nail.
You want the chrome to stay on the nail surface. Extra powder around the edges can make the finished manicure look messy.
A soft makeup brush can work for this if you do not have a nail brush.
Step 7: Seal the Chrome
Now you need to protect the finish.
Apply your top coat carefully over the chrome surface. Make sure the tip of the nail is covered too.
Some people notice that their chrome loses shine after adding the top coat. This can happen if the top coat is applied too heavily or rubbed too much.
Use a thin layer. Cure it properly.
Once it is cured, you should have a smooth chrome finish with much less loose powder.
How to Apply Chrome Powder to Nails Without Making a Mess
Chrome powder is very fine. It can get on your fingers, table, clothes, or anything sitting nearby.
There are a few simple ways to keep things cleaner.
First, use less powder. Most beginners use far too much.
Second, keep your hand over a paper towel or tray while applying it. That makes the extra powder easier to clean.
Third, use a small sponge instead of your finger. A sponge gives you more control.
Finally, brush away loose powder before applying your final top coat.
You do not need a huge pile of powder to get a mirror finish. In fact, too much can make the surface look uneven.
How to Make Chrome Nails Shiny
The shine comes down to a few simple things.
Your nail needs to be smooth before the chrome goes on. If the color underneath has bumps, the chrome will show them.
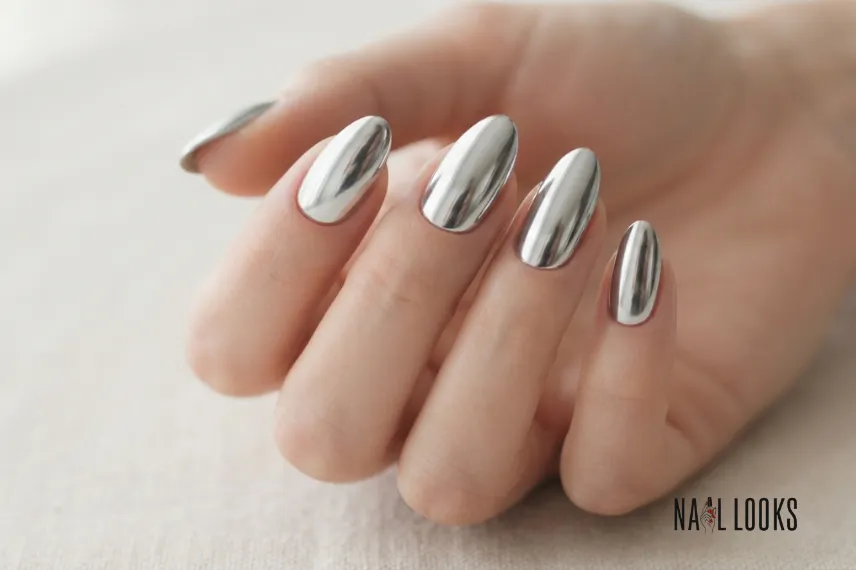
The no-wipe top coat also needs to cure correctly. If it is not ready for chrome powder, the powder may look dull.
Use a small amount of powder. Rub it firmly enough to spread it, but do not scrape at the surface.
The final top coat matters too. A good clear top coat can bring the shine back after sealing.
If your chrome looks more like glitter than metal, check these areas first.
Chrome Powder Looks Patchy. What Went Wrong?
Patchy chrome usually means something was uneven underneath.
Look closely at your base color. Are there bumps? Thin spots? Uneven areas?
Chrome does not hide those problems. It can actually make them easier to see.
The top coat should also be smooth. If you have a thick area near one side of the nail, the powder may look darker or lighter there.
Try using smaller amounts of powder. Rub it across the nail until the color looks even.
Do not keep adding more powder to a bad base. Fixing the layer underneath is usually the better answer.
How to Use Chrome Powder on Gel Nails
The basic gel method is simple once you know the order:
Gel base → gel color → no-wipe top coat → cure → chrome powder → remove extra powder → final top coat.
The order matters.
Do not put the chrome powder directly over your color unless your product says it is designed for that use.
The no-wipe layer creates the surface where the powder can spread.
For your first attempt, silver chrome over black gel is a good place to start. You can clearly see whether the powder is working.
Once you get comfortable, try colored chrome over different base shades.
How to Do Chrome Nails With Regular Polish
Start with clean, dry nails.
Apply your normal base coat. Let it dry fully.
Apply your chosen color. Black or white can work well for a chrome-style effect.
Let the color dry completely before moving on.
Then apply a very thin layer of a clear polish or top coat that stays slightly tacky as it dries.
Wait until it is no longer wet but still has a little grip.
Gently rub a tiny amount of chrome powder over the surface.
Work one nail at a time because regular polish can dry quickly.
Once the powder looks even, brush away the extra.
Finish with a clear top coat.
The final effect can look shiny, but it may not have the same mirror finish you get with gel.
That is normal.
How to Make Chrome Powder Stick to Nails
If the powder keeps falling away, check the surface first.
Your nail should be clean. Your top coat should be the right type. Your curing time should match the product instructions.
Do not touch the nail after curing the no-wipe top coat. Oils from your fingers can affect how the powder behaves.
Use a small amount of powder.
Rub it into the nail rather than simply pressing it onto the surface.
You should see the powder spread as you rub. When the nail starts looking smooth and metallic, you have enough.
If you keep adding powder after that point, you may just create more loose dust.
How to Seal Chrome Powder on Nails
Sealing chrome powder is important because loose powder can rub away.
Use a clear top coat that works with your manicure system.
Apply it gently. Try not to drag the brush over the chrome too many times.
Make sure you cover the whole nail.
The free edge matters too. Run a little product across the tip so the chrome is sealed.
If your top coat makes the chrome look dull, test it on one nail first. Some top coats change the finish more than others.
A thin layer is usually better than a thick one.
How to Do Chrome Nails Without Chrome Powder
If you do not have chrome powder, you can still create a shiny metallic look.
The easiest option is a metallic nail polish.
Silver polish can give you a chrome-like effect without using powder.
Metallic foil can also create a shiny finish. You can use small pieces as accents rather than covering the entire nail.
Another easy idea is a mirror-effect nail sticker or wrap.
These options will not behave exactly like chrome powder. The surface may not look like a true mirror.
But if your goal is simply a shiny metallic manicure, they can work well.
How to Remove Chrome Powder From Nails
Chrome powder itself is usually not the hard part to remove. The gel underneath is what needs more care.
If you are wearing gel polish, follow the normal removal method for your gel system.
Do not peel the gel off your natural nails.
For soak-off gel, the usual process involves filing the shiny top layer, soaking the product with acetone, then gently removing the softened gel.
If the product does not soften, do not force it. Some gel systems need a different removal method.
Once everything is removed, clean the nails gently.
Give your nails a break if they feel thin or sore.
Common Chrome Nail Mistakes
Using Too Much Powder
More powder does not always mean more shine.
Too much can leave loose powder around the nail.
Start with a tiny amount. Add more only when you need it.
Skipping the No-Wipe Top Coat
If your product requires a no-wipe surface, skipping it can lead to a poor finish.
The powder needs the right surface to spread properly.
Touching the Nail Before Applying Powder
Your fingers carry natural oils.
Touching the nail after curing can make the chrome less even.
Try to keep your fingers off the surface.
Uneven Base Color
Chrome will show bumps, gaps, and uneven color underneath.
Take your time with the base.
A clean base gives you a much better result.
Rubbing Too Hard
Chrome powder needs pressure, but you do not need to scrub aggressively.
Use small, steady movements.
Stop once the surface looks smooth.
Applying a Thick Top Coat
A thick layer can change the chrome finish.
Try a thin, even layer instead.
Final Thoughts
Learning how to do chrome nails at home is mostly about getting the layers right. The powder itself is not the hardest part. The real difference comes from the surface underneath it.
For gel nails, a smooth base plus the right no-wipe top coat usually gives you the easiest path to a shiny finish. Use a small amount of powder, rub it evenly, then seal it with a thin top coat.
If you do not have a UV light, regular polish can still give you a chrome-style look. Just remember that the timing is different because regular polish dries in the air.
Do not get discouraged if your first try looks patchy. Check the base, the top coat, the drying or curing time, and the amount of powder before blaming the chrome itself.
Once you get those few things right, chrome nails become much less scary. A simple silver set can look cool on its own, while chrome French tips or colored chrome give you plenty of room to play.