Halloween Nail Ideas: Cute, Spooky & Trendy Designs for 2026
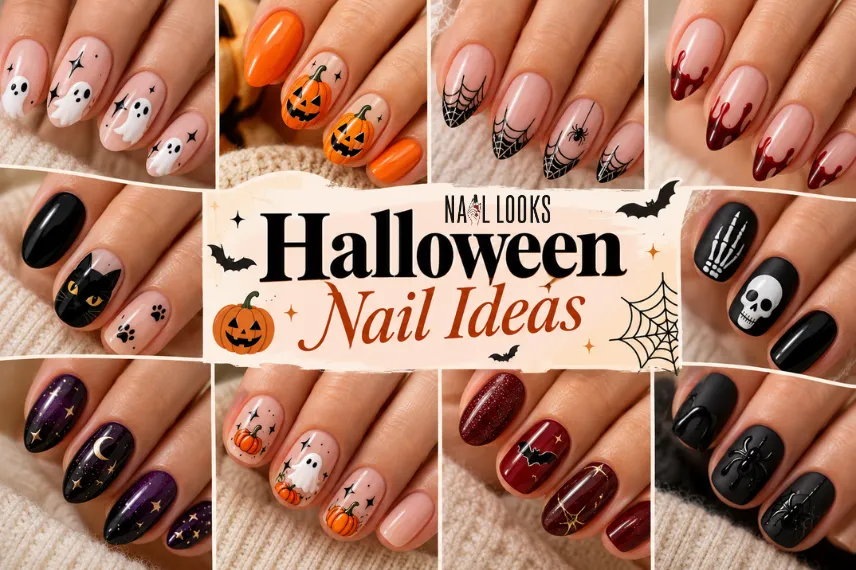
Halloween nail ideas can be simple, cute, spooky, or bold. Maybe you want tiny ghosts on a clean nude base, or you might prefer dark red velvet nails that still look good after Halloween. There are also plenty of fun choices for short nails, long nails, acrylics, and easy DIY manicures.
From classic Halloween characters to chrome, cat-eye, French tips, and simple fall colours, these designs give you plenty of ways to make your manicure feel festive without making every nail look the same.
Halloween Nail Ideas That Make a Statement
If you want people to notice your Halloween manicure, start with one of the classic spooky designs below. They use familiar Halloween details but give each one a different look.
1. Ghost Nails
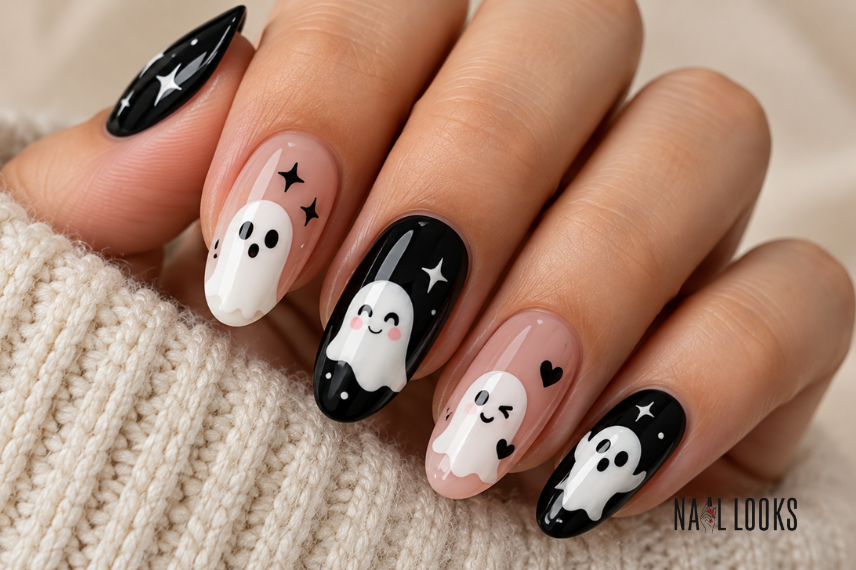
A few white ghosts on a black, nude, or milky base are enough to make the manicure instantly recognisable. Give them tiny eyes and different expressions rather than making every ghost identical.
The artwork is fairly easy to paint with a small nail-art brush, so beginners can give this one a try. On short nails, smaller ghosts will be easier to fit.
2. Jack-o’-Lantern Nails
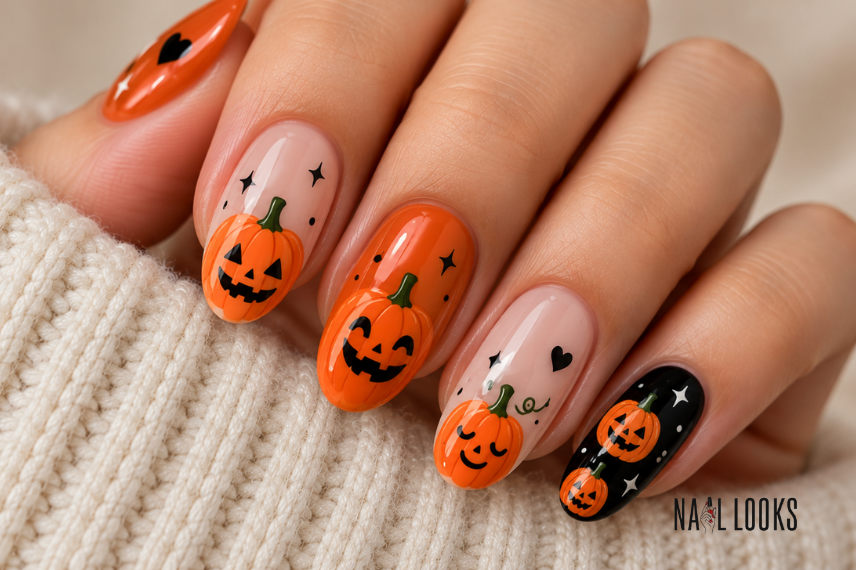
Turn your nails into a tiny pumpkin patch with orange jack-o’-lanterns over a nude, cream, or dark base. Change the faces slightly from nail to nail to make the set feel less repetitive.
A thin nail-art brush makes the eyes and mouths easier to control. Stickers are another simple option if freehand pumpkin faces are difficult.
3. Spiderweb Nails
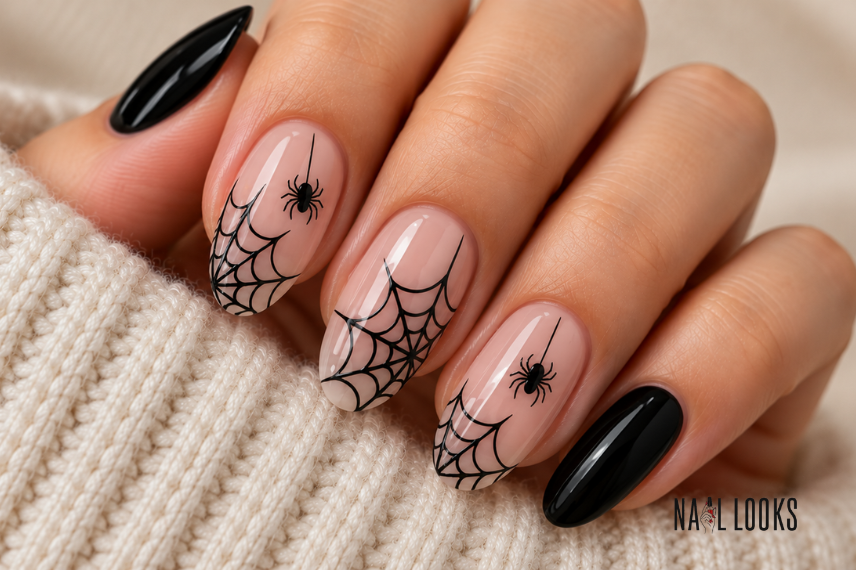
Thin black lines spread across the nail to create a classic spiderweb. A nude or pale base makes the web easy to see, while a black base gives it a darker look.
For a cleaner manicure, place the web on only one or two accent nails. A stamping plate can also make the fine lines much easier for beginners.
4. Bat Nails
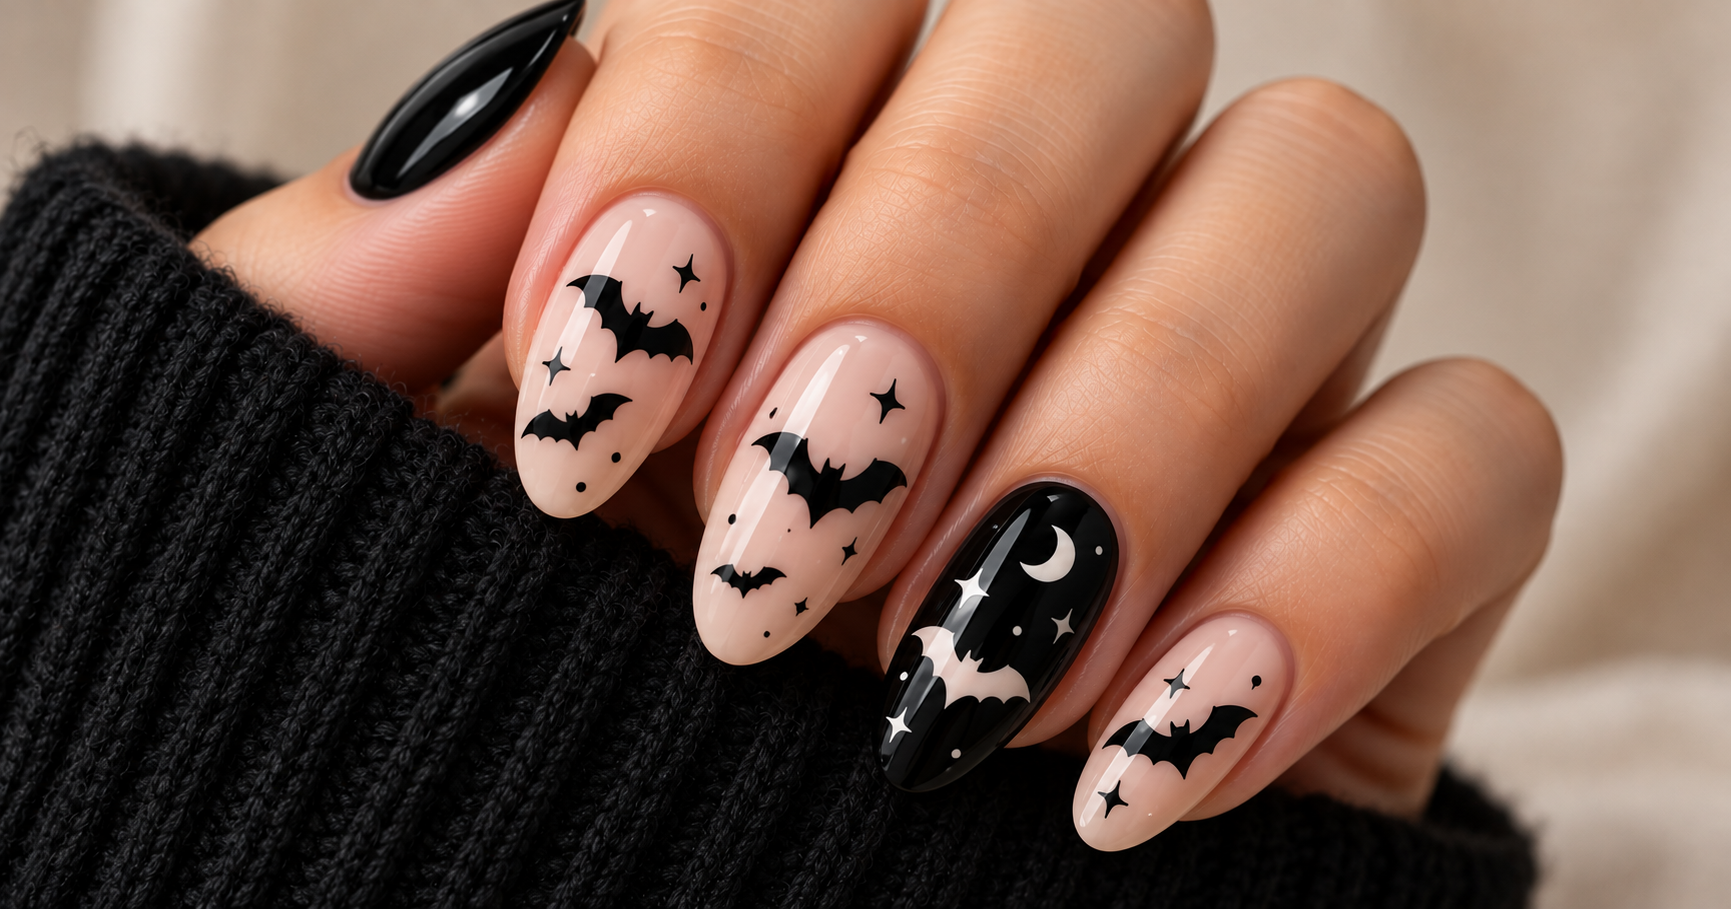
Small black bats flying across the nails give this manicure a completely different feel from a full bat silhouette covering the nail.
Use a pale base such as cream or grey and place the bats at different heights. A few tiny stars around them can make the design look like a night sky.
5. Bloody Drip Nails
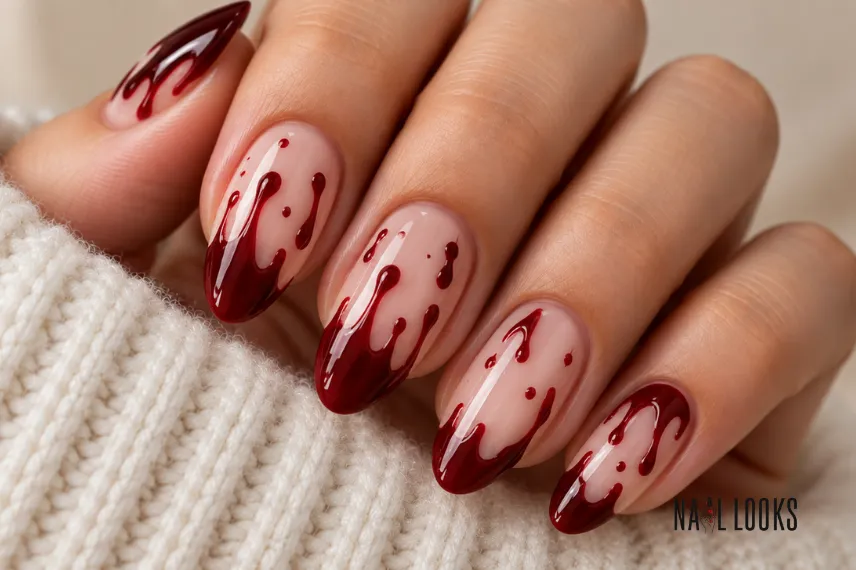
Deep red polish starts at the tip and runs down in uneven drops over a nude or milky base. The uneven edges are what make the design look like dripping blood.
A dotting tool can help create the rounded ends of the drips. Burgundy gives the same idea a darker, less bright finish.
6. Skeleton Nails
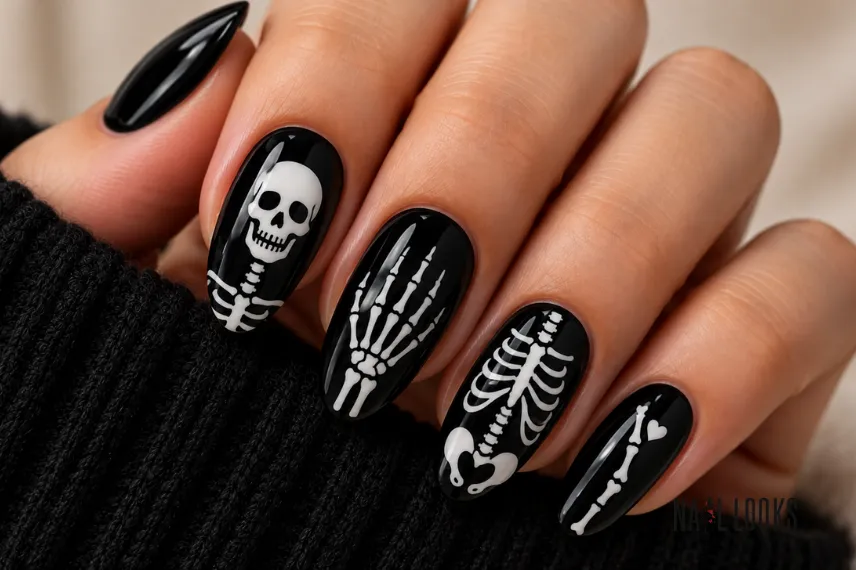
White bones stand out sharply against a black base. Rather than drawing a full skeleton on every nail, use small bone sections on a few fingers and leave the others plain.
This design has more tiny details than a ghost or pumpkin manicure, so longer nails give you more room. Nail stickers can make the artwork much easier.
7. Black Cat Nails
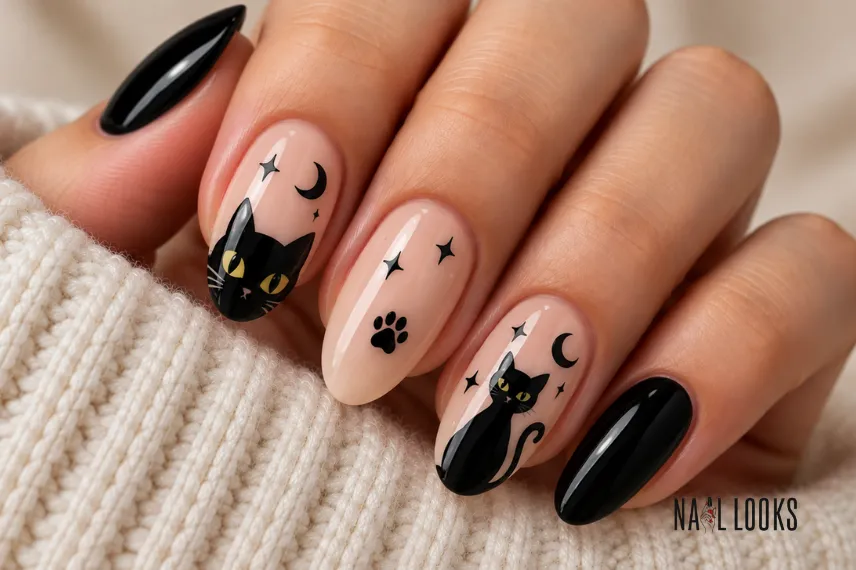
A black cat silhouette brings a playful Halloween detail to the manicure. Paint the cat on a light base or use only the face and pointed ears for a smaller design.
Tiny yellow or green eyes add a little colour without taking over the manicure. This is also easy to turn into an accent nail.
Cute Halloween Nail Ideas
Halloween does not have to mean dark colours and scary artwork. These designs use small characters, softer colours, and playful details.
8. Cute Ghosts
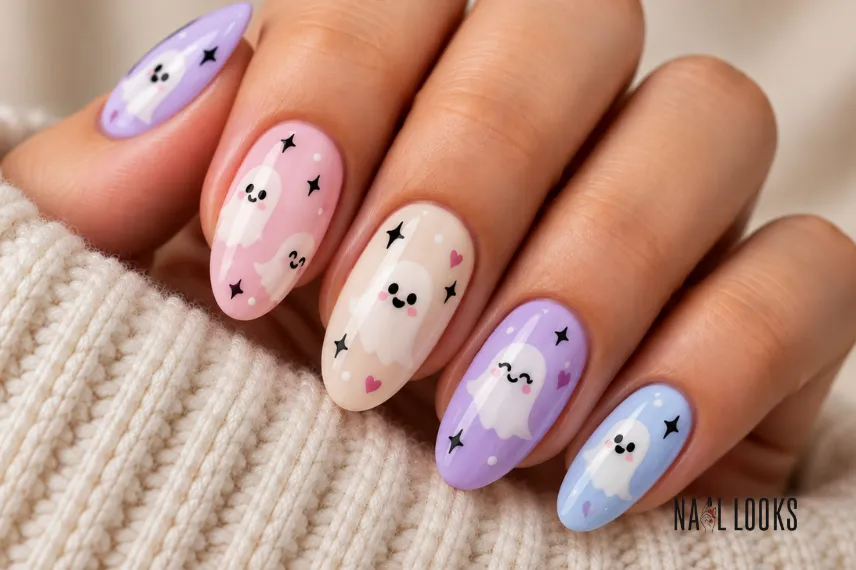
Give little white ghosts different faces and place them over lavender, pale pink, cream, or light blue nails.
The soft base colours change the mood completely. Since the shapes are simple, this is one of the easier designs to recreate at home.
9. Mini Pumpkin Nails
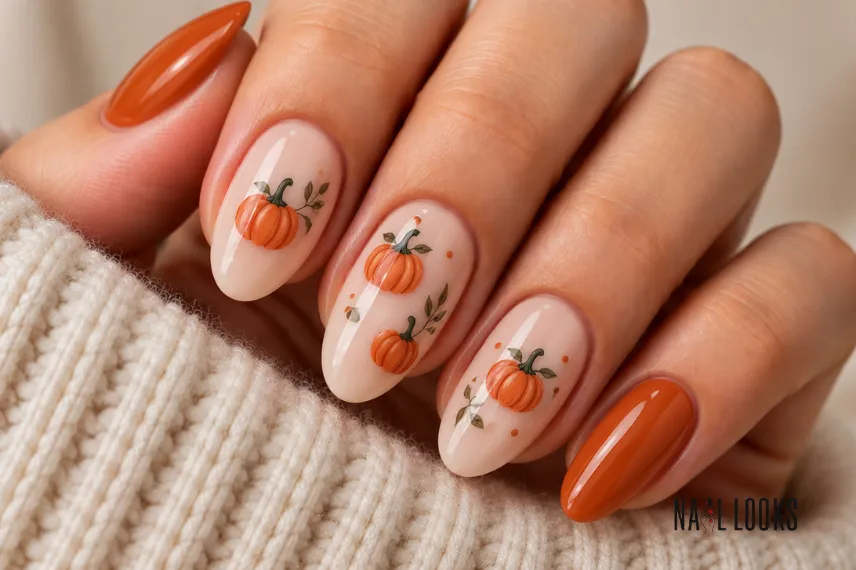
Instead of covering the whole nail with a large pumpkin, place tiny pumpkins near the cuticle or in the middle of the nail.
A plain background gives these small details room to stand out. They are especially practical for short nails, where large artwork can feel crowded.
10. Halloween Doodle Nails
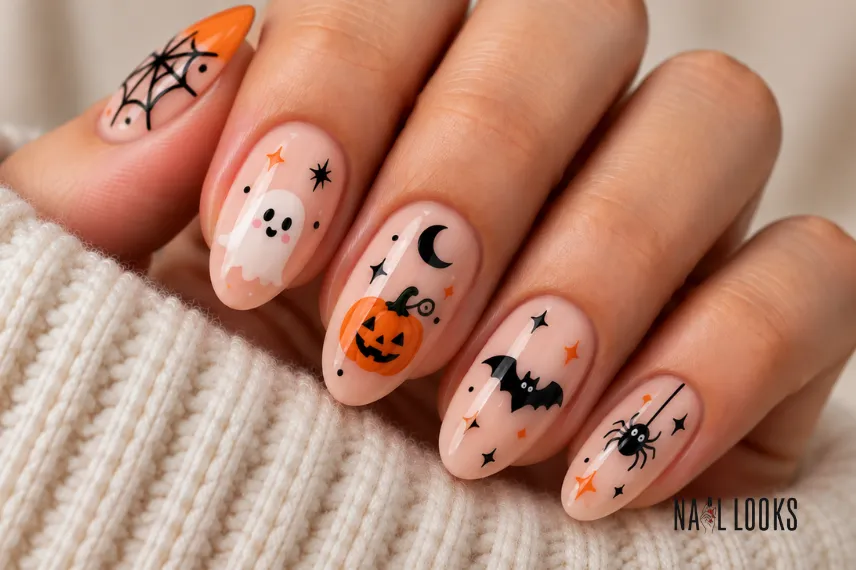
Turn each nail into a tiny Halloween drawing with a mix of moons, stars, pumpkins, ghosts, bats, and spiders.
There is no need for every nail to match. Using the same two or three colours throughout the set is enough to make the different doodles look connected.
11. Pastel Halloween Nails
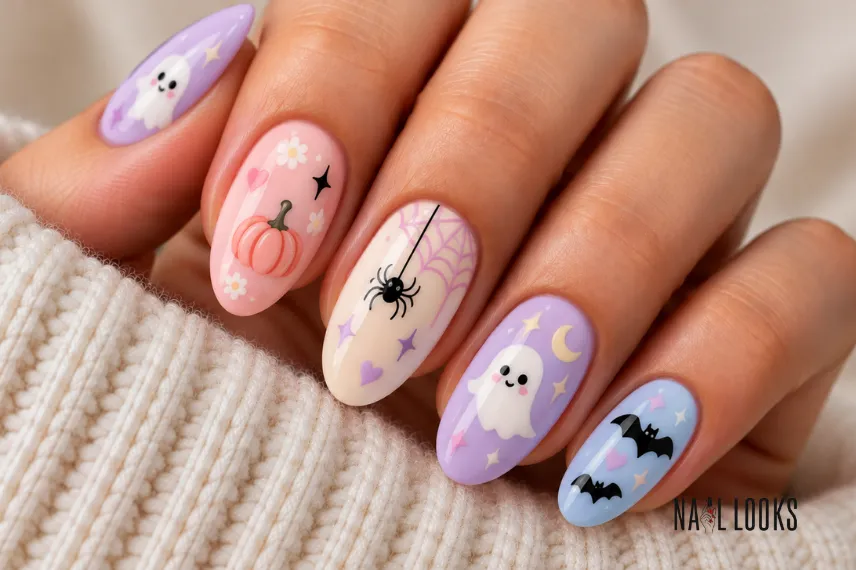
Soft colours give traditional Halloween designs a lighter look. Think lavender ghosts, pale blue bats, pink pumpkins, or cream spiderwebs.
This style suits anyone who likes cute nails but does not want a dark or dramatic manicure. A glossy top coat helps the pastel colours look fresh.
12. Halloween Mix-and-Match Nails
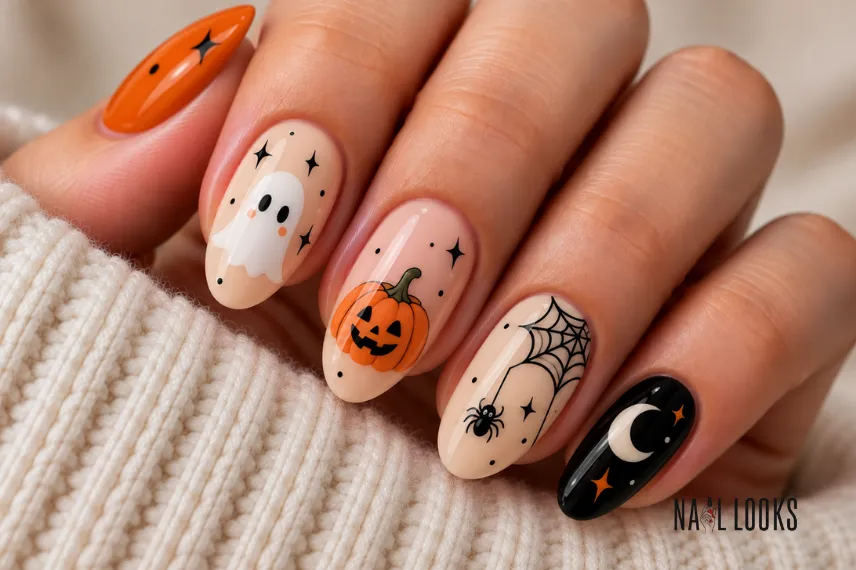
Give each nail its own small Halloween design instead of repeating one pattern across the whole set.
One nail might have a ghost, another a pumpkin, another a spiderweb, and another a tiny moon. Limiting the colours keeps the mix from becoming too busy.
13. Pumpkin and Ghost Nails
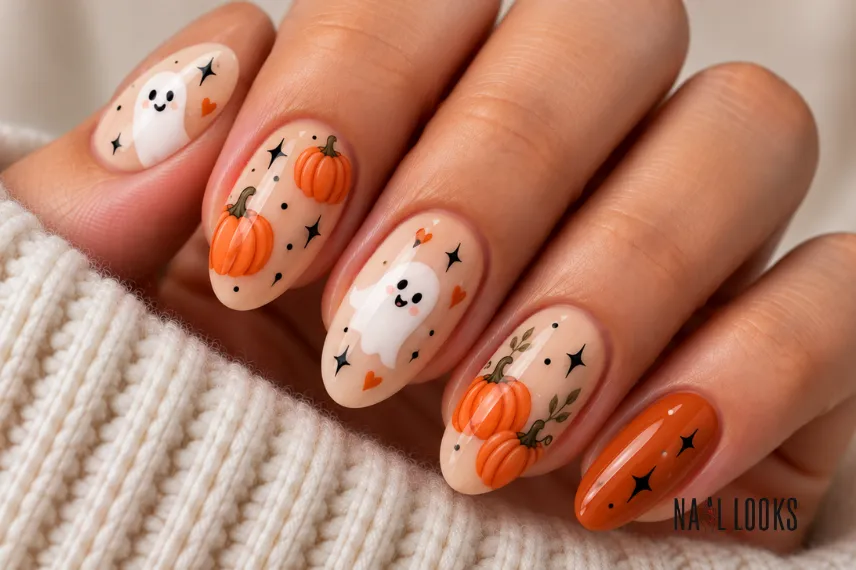
Pair two of the easiest Halloween motifs: pumpkins and ghosts.
Orange pumpkins can sit beside white ghosts on a cream, nude, or dark base. Because the shapes are simple, this combination is suitable for a beginner who wants more than one design without taking on complicated artwork.
Dark Halloween Nails
For a darker manicure, the colour itself can create most of the Halloween mood. These ideas are especially useful if you prefer nails that still look wearable after October.
14. Black and Red Nails
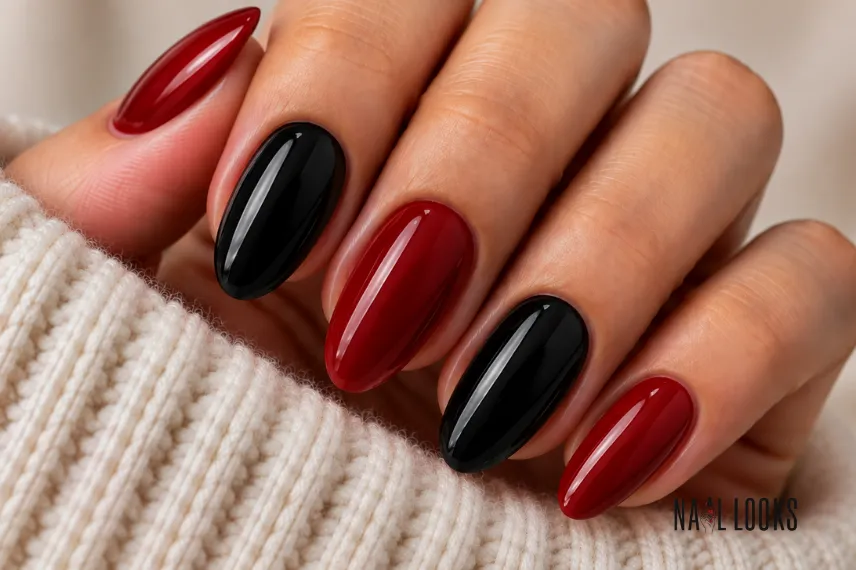
Black and deep red make a strong pair without needing detailed nail art.
Alternate the two shades across your nails, or use red on a few accent nails. A glossy finish gives the colours more depth, while matte polish makes the set look darker.
15. Burgundy Halloween Nails
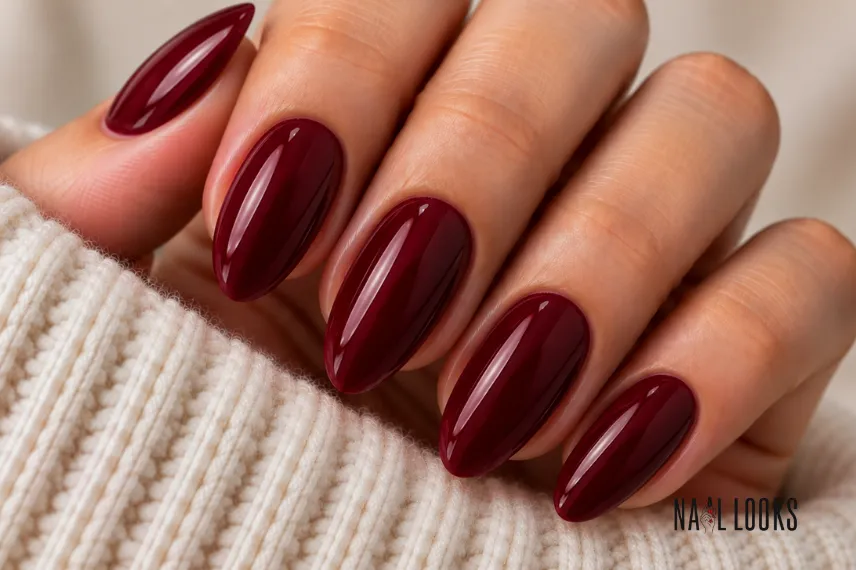
A rich burgundy manicure has a Halloween feel without any characters or artwork.
It is also one of the easiest designs to maintain because there are no small details to chip or smudge. Add a shiny finish for a simple everyday manicure.
16. Dark Purple Nails
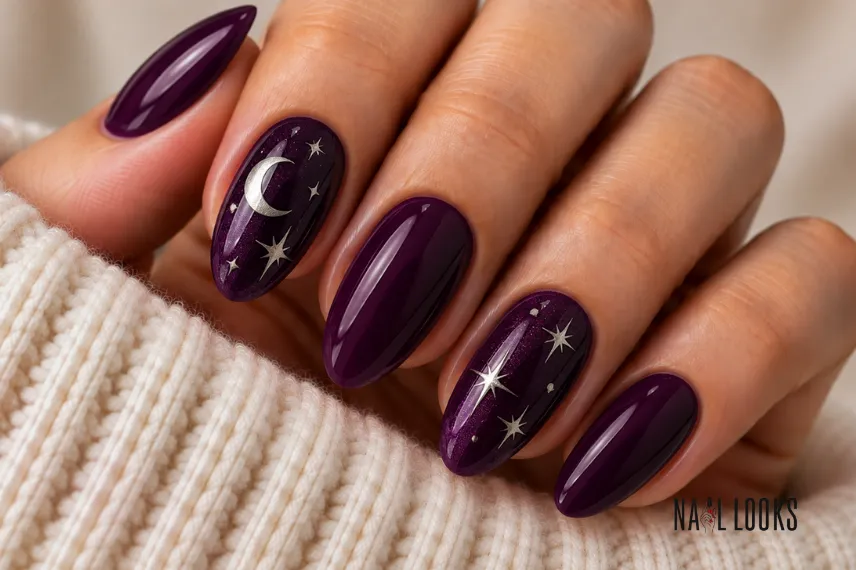
Deep purple offers a softer alternative to black. Leave it plain for a clean manicure, or add tiny moons and stars for a witchy touch.
A shimmer or metallic top layer can make the purple more noticeable without adding extra artwork.
17. Vampire Red Nails
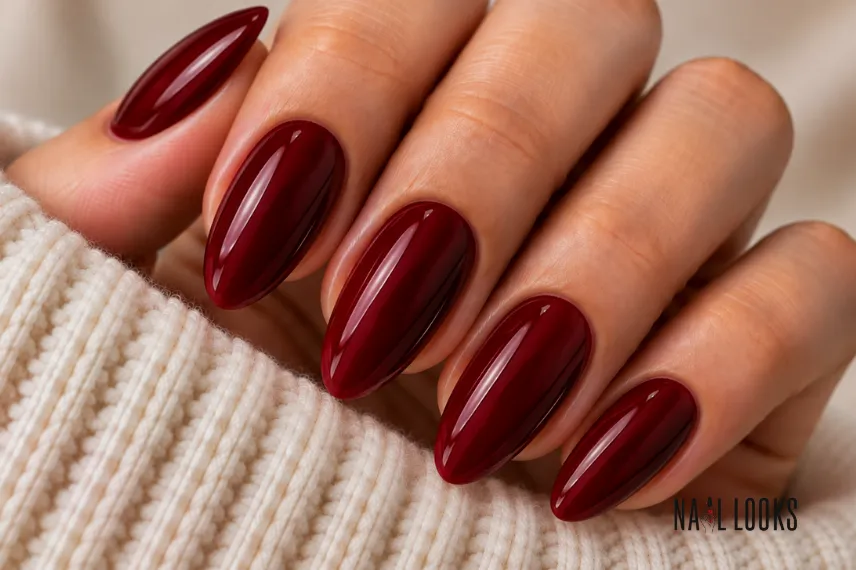
Go for a deep red shade inspired by classic vampire colours.
The long almond shape makes this manicure more dramatic, while short square nails give the same colour a simpler feel. No nail art is needed—the shade and shape carry the look.
18. Black Cat-Eye Nails
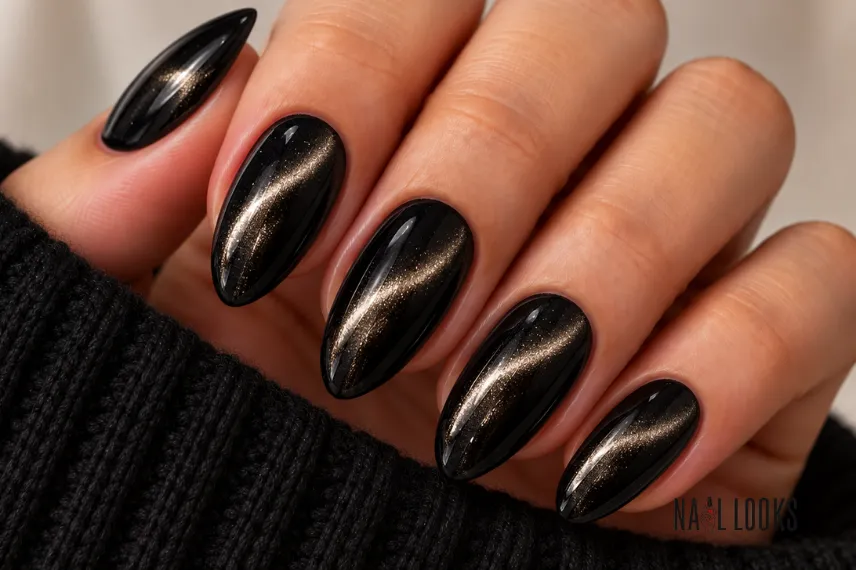
Magnetic black polish creates a bright line that moves across the nail as the light changes.
That shifting effect gives plain black nails much more depth. Because the finish does the visual work, this one is best left without extra artwork.
19. Burgundy Velvet Nails
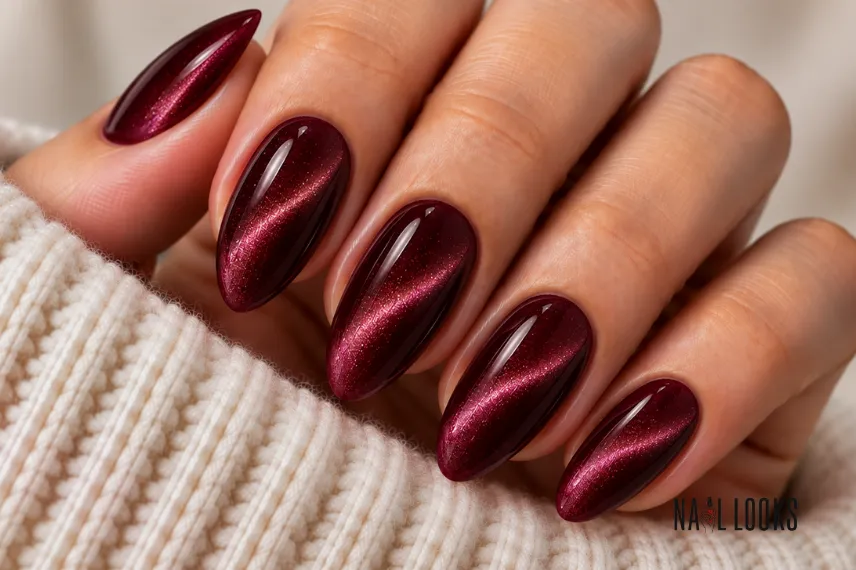
Burgundy magnetic polish can create a soft velvet effect that catches the light without looking overly decorated.
This is a useful option if you want a Halloween manicure that can stay on well into November. A nail technician can create the magnetic effect easily, while DIY magnetic polish kits are available for home use.
Simple and Subtle Halloween Nails
Not everyone wants obvious Halloween characters. These designs add small seasonal details while leaving plenty of space on the nails.
20. Black Micro French Tips
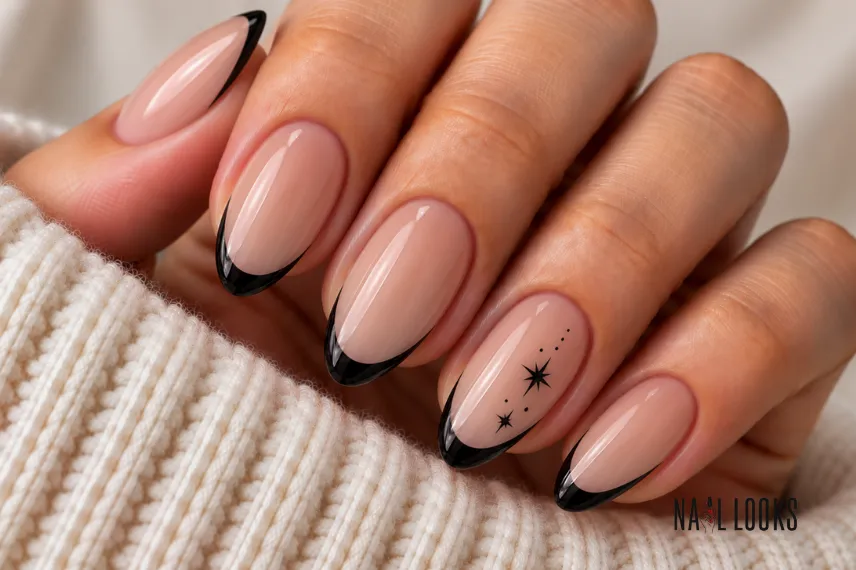
A sheer nude base with an ultra-thin black tip gives you a very simple Halloween-inspired manicure.
Add one tiny star or spider to an accent nail if you want a clearer holiday connection. The thin French line is also easy to adapt to short nails.
21. Ghost Accent Nails
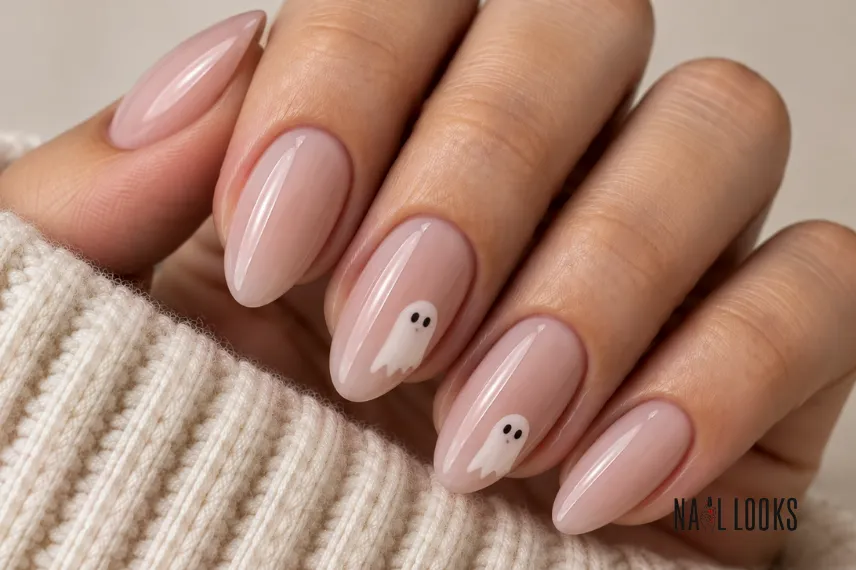
Leave most of the manicure plain and place a single white ghost on one or two nails.
A milky or nude base keeps the look soft. This is an easy way to wear Halloween nail art at work or in situations where a full spooky set might feel too much.
22. Tiny Spider Nails
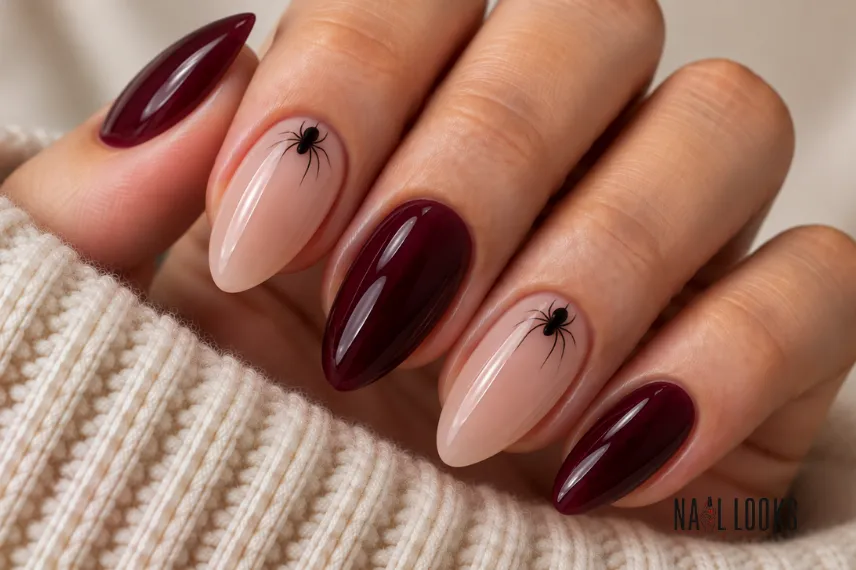
A tiny black spider near the cuticle creates a small surprise without covering the nail in artwork.
The rest of the nails can stay nude, sheer, burgundy, or black. Because the spider is so small, a nail technician or fine detail brush will give better results than a large brush.
23. Halloween Colour Mix
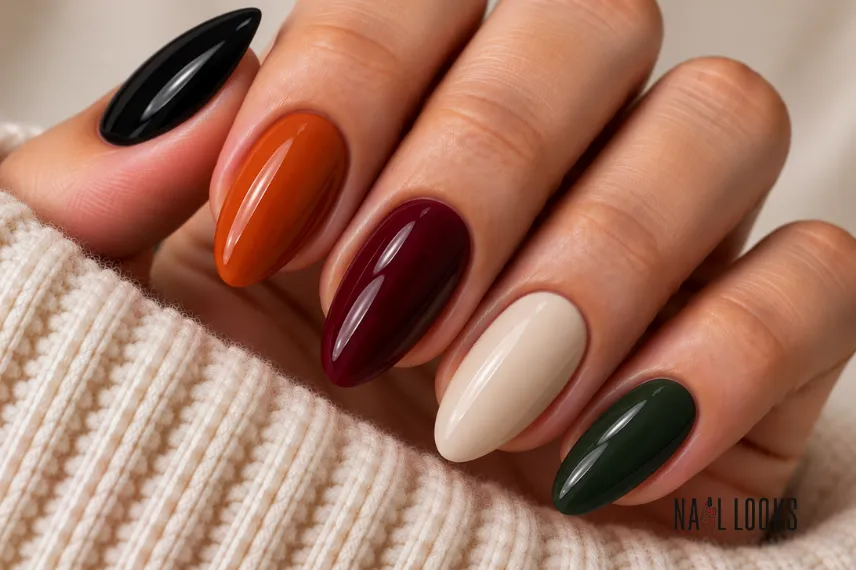
Skip the artwork completely and let the colours create the theme.
Black, burnt orange, burgundy, cream, and dark green can be mixed across the nails in different combinations. This is one of the simplest options for a DIY manicure.
24. Sheer Halloween Nails
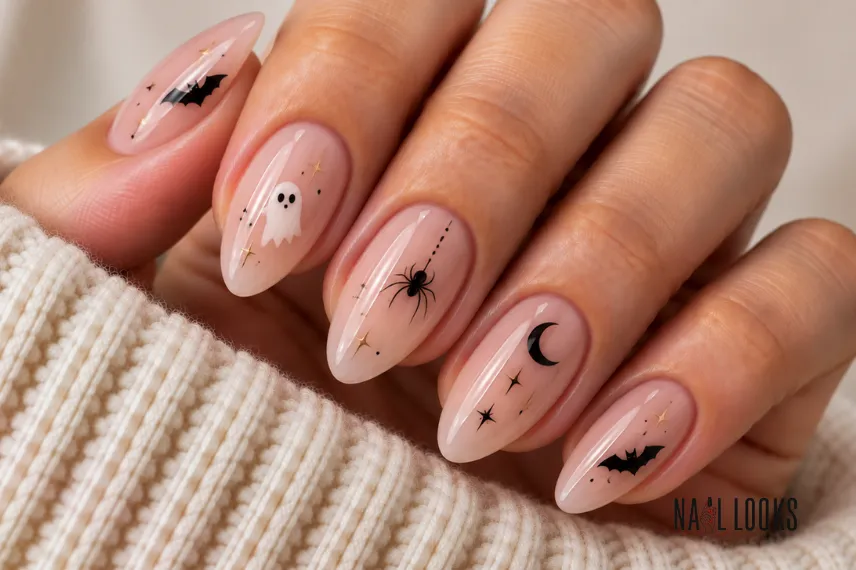
Start with a translucent nude, pink, or milky base and place very small Halloween details over it.
Tiny bats, spiders, stars, or ghosts keep the manicure light because much of the natural-looking base remains visible. The style suits anyone who wants something festive but not loud.
Modern Halloween Nail Designs
These ideas use finishes and effects to create a Halloween look without relying only on traditional characters.
25. Halloween Chrome Nails
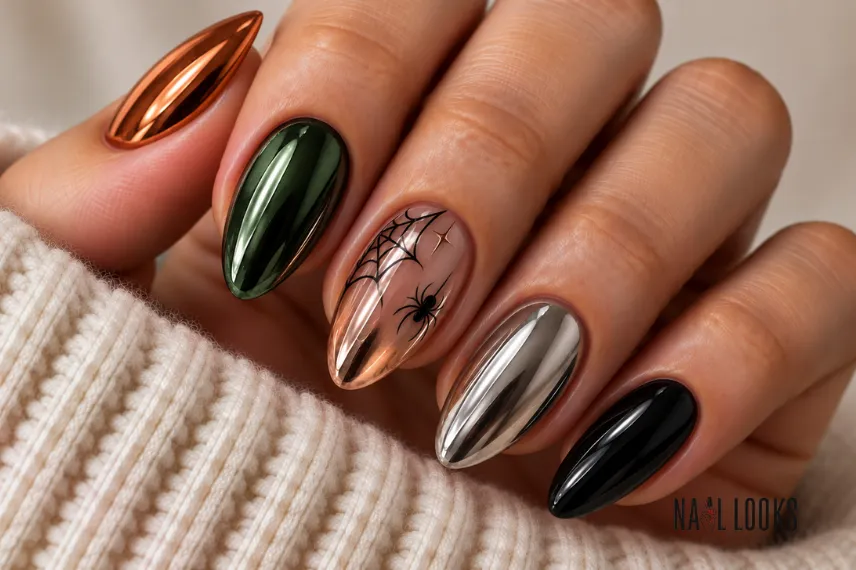
Chrome turns familiar Halloween colours into something more modern. Silver, copper, dark green, and black chrome all give a different result.
For a stronger Halloween connection, place a small spiderweb or ghost on one nail. Otherwise, the metallic finish can stand on its own.
26. Halloween Cat-Eye Nails
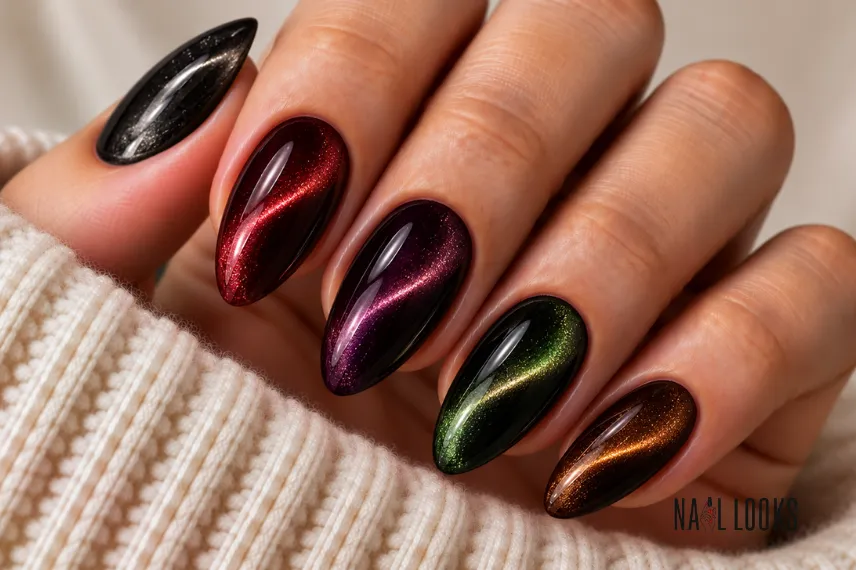
Magnetic polish is a simple way to get movement and shine without detailed nail art.
Black, burgundy, purple, green, and deep red are all good choices. The final effect changes as the light hits the nails, making even a single-colour manicure look interesting.
27. Halloween Jelly Nails
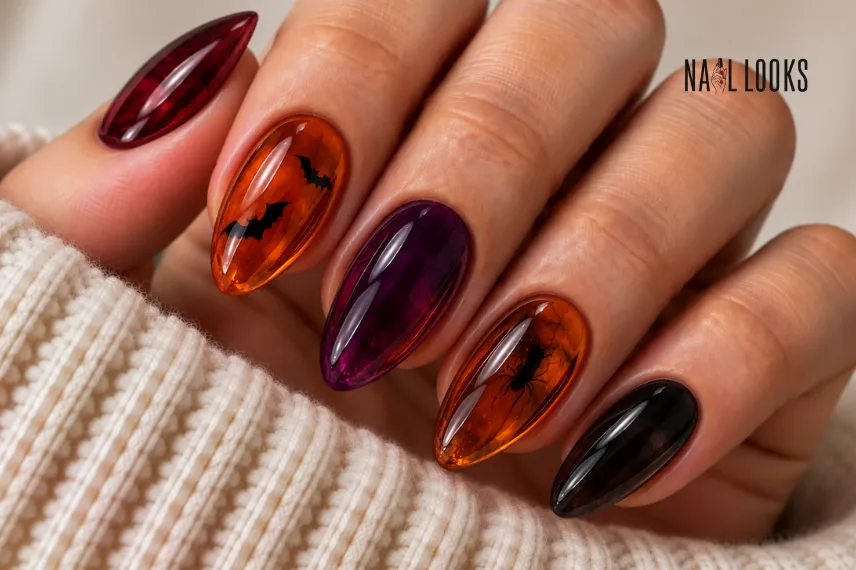
Jelly polish gives colours a clear, glass-like appearance. Red, orange, purple, and black are especially suitable for Halloween.
Layer a small design underneath the jelly for a more unusual look, or leave the translucent colour alone for a cleaner manicure.
28. Halloween Aura Nails
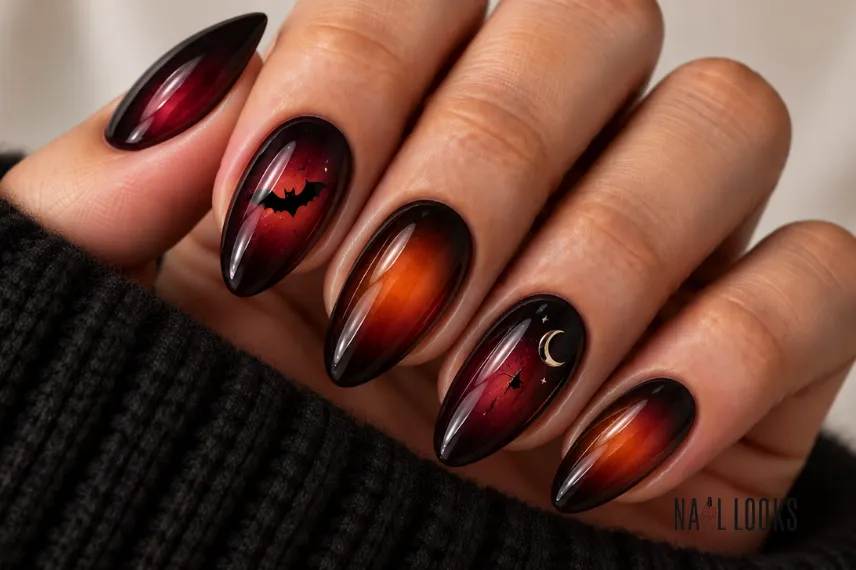
Blend two colours so the centre of the nail looks softly lit from within.
Black and burgundy create a dark version, while orange and red give the manicure a warmer Halloween feel. A tiny bat or moon on one nail is enough to make the theme clear.
29. 3D Halloween Nails
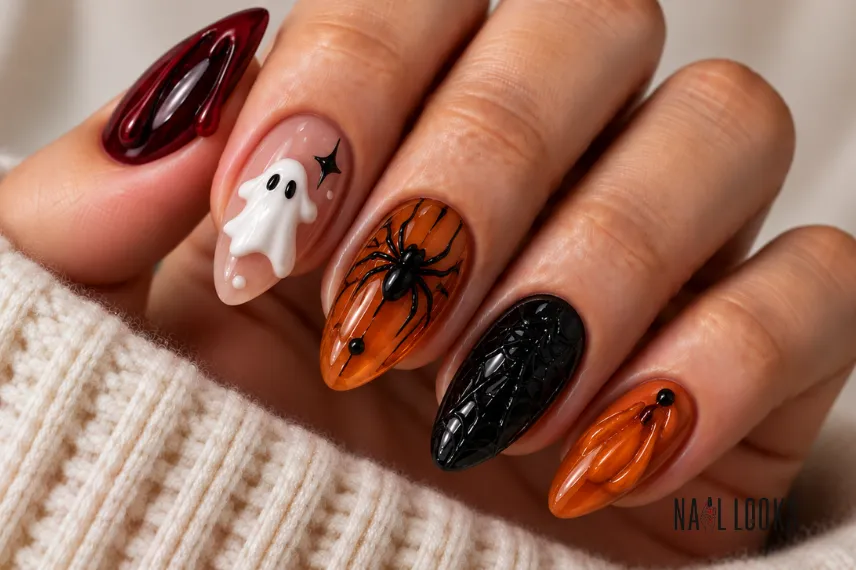
Raised nail art gives you room to create spiders, eyes, ghosts, drips, or other spooky details that stand out from the surface.
This type of design is usually better left to a nail technician, especially when several raised elements are involved. One or two 3D accent nails can have plenty of impact without making the full set too heavy.
30. Matte Black and Glossy Details
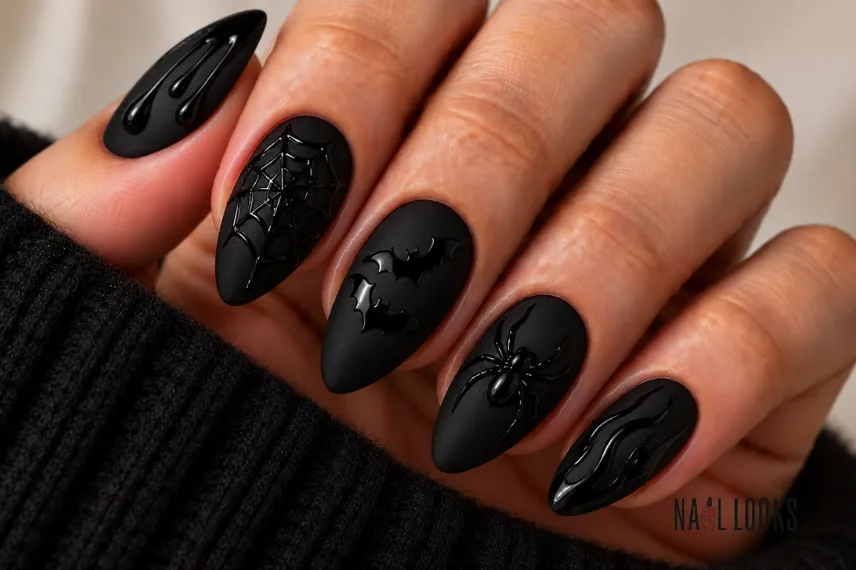
Start with a matte black manicure, then place glossy black details over the top.
Spiderwebs, drips, bats, or simple lines become visible because the two finishes reflect light differently. It is a clever option when you want an all-black set with more than just plain polish.
Halloween French Tip Ideas
French tips give you another way to bring Halloween colours and details into the manicure without covering the entire nail.
31. Blood Red French Tips
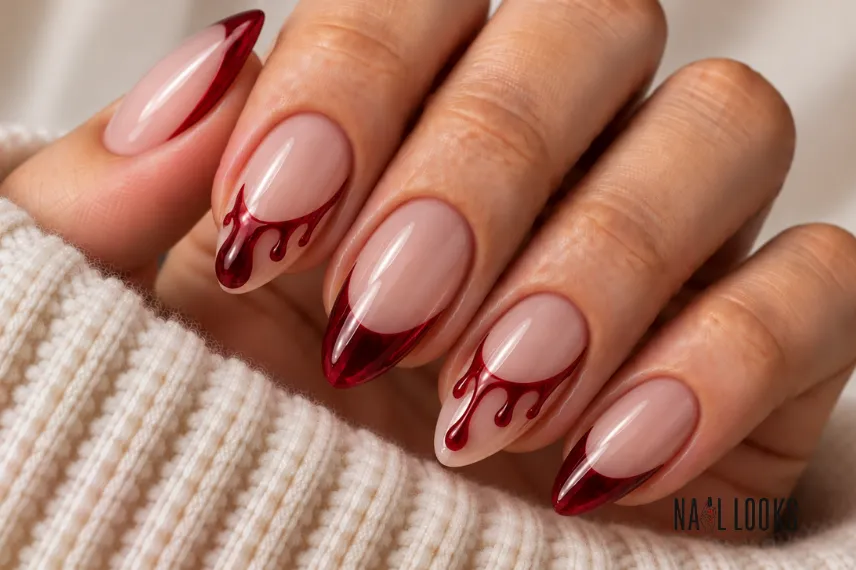
Replace the usual white French tip with deep red.
A straight red tip keeps the manicure simple, while uneven drops along the edge create a blood-drip effect. The nude base balances the stronger red colour.
32. Spiderweb French Tips
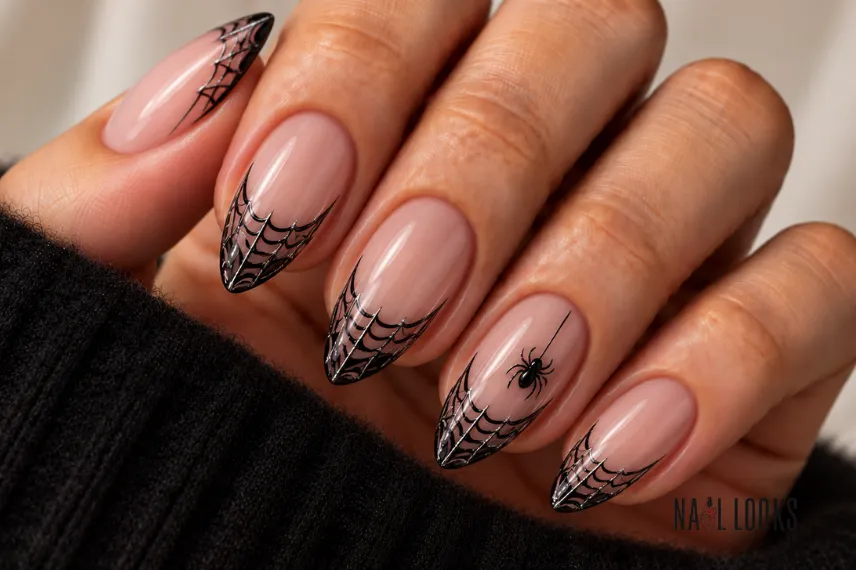
Instead of filling the tips with one solid colour, build the French edge from thin spiderweb lines.
Black works for a classic spooky look, while silver gives the same idea a more delicate finish. This design is easier to control on medium or long nails.
33. Pumpkin French Tips
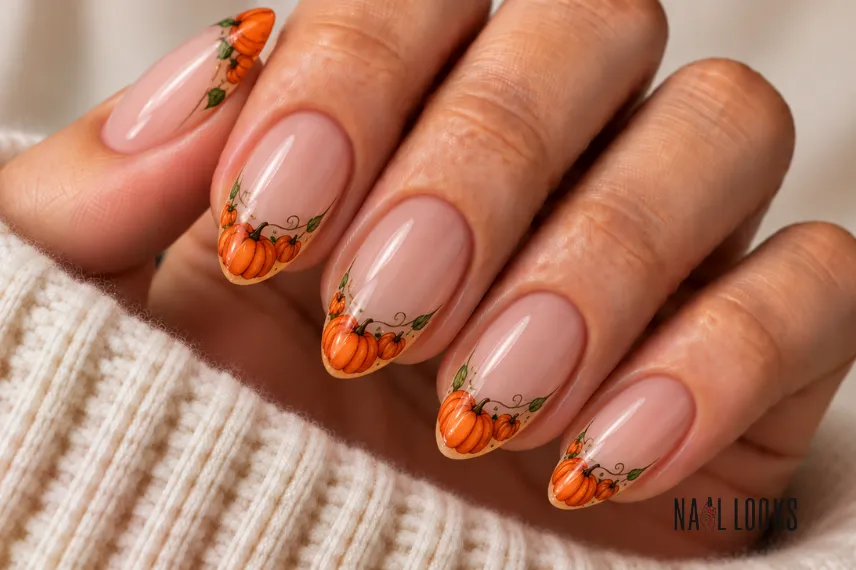
Tiny orange pumpkins can replace the usual French line.
Place the pumpkin shapes along the tips and leave the rest of the nail sheer. Since the artwork stays near the edge, the design does not need much space and can work on shorter nails too.
Halloween Nail Ideas for Short Nails
Short nails do not need large artwork. Small designs, thin lines, and simple colours usually look cleaner on a shorter nail.
34. Short Black Halloween Nails
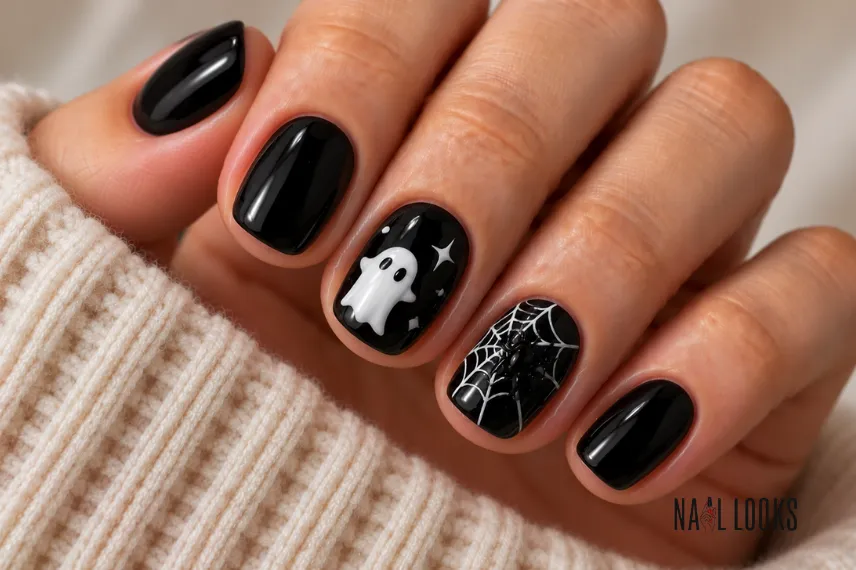
A glossy black manicure already has a strong Halloween feel. Add one small white ghost or tiny spider to break up the solid colour.
The design is quick to do at home and does not require much nail length. A single accent nail can be enough.
35. Short Halloween Accent Nails
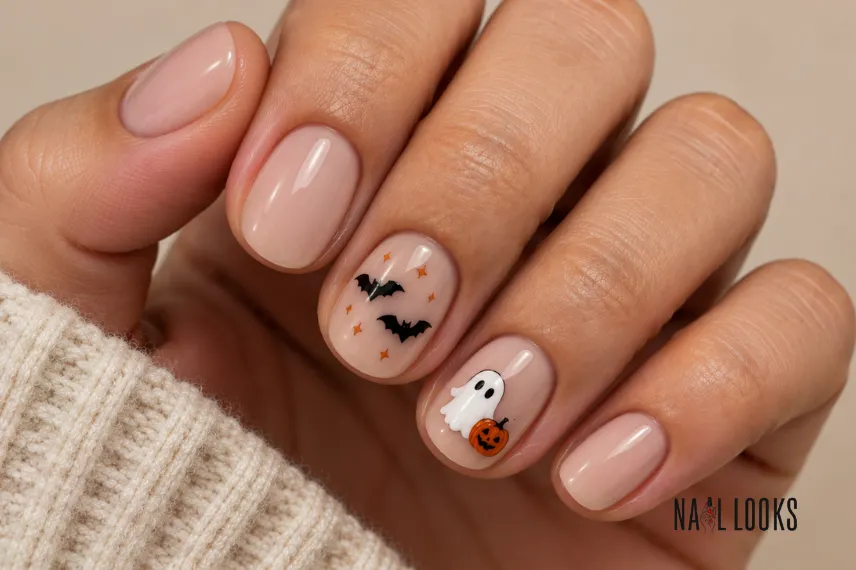
Start with a nude or light base and add small Halloween designs to two or three nails.
Tiny pumpkins, ghosts, bats, or webs are easier to place than large artwork. Leave the remaining nails plain so the details do not compete with each other.
Halloween Nail Colours to Try
The right colour can make a simple manicure feel ready for Halloween without any nail art.
- Black: A classic choice for spooky, gothic, and simple designs.
- Burgundy: Deep enough for Halloween while still feeling like a fall colour.
- Deep red: A natural fit for vampire and blood-inspired designs.
- Dark purple: Adds a witchy feel without using black.
- Burnt orange: Perfect for pumpkins and warm fall designs.
- Chocolate brown: A softer option when black feels too strong.
- Cream and nude: Give small Halloween artwork a clean background.
- Dark green: Useful for slime, witchy, and monster-inspired designs.
- Silver: Adds shine to spiderwebs, stars, chrome, and other details.
There is no need to combine every shade. Two or three colours are usually enough for a balanced manicure.
How to Choose Your Halloween Nails
Your nail length, the amount of detail you enjoy, and whether you plan to do the manicure yourself can all help narrow down the choices.
Short nails leave enough space around tiny ghosts, small pumpkins, micro French tips, spiders, and simple colour combinations.
Long nails give larger artwork, detailed French tips, chrome, 3D decorations, and full Halloween scenes more room to develop.
Almond nails, thanks to their longer shape, suit cat-eye polish, French tips, ombre effects, and designs that follow the length of the nail.
Square nails naturally fit graphic designs, colour blocks, spiderwebs, and straight French tips.
Acrylic extensions add extra space for large artwork, chrome effects, 3D details, and layered designs.
If you’re after an easy DIY manicure, start with a solid colour and add one simple accent — black nails with a tiny ghost or nude nails with small spiders require much less precision than a full Halloween scene.
A subtler look comes from burgundy, sheer nails, black micro French tips, tiny spiders, and dark cat-eye polish.
For something bolder, blood drips, 3D artwork, chrome, bright green, and mix-and-match designs will make the manicure much more noticeable.
How to Make Halloween Nails Last Longer
A little preparation can help your manicure stay neat throughout the Halloween season.
Start with clean nails and apply a base coat before your polish. Let each layer dry properly before adding nail art or another coat.
Finish with a good top coat to protect the design. Be careful when opening cans, scratching surfaces, or doing chores, since these everyday tasks can chip the tips.
For gel or acrylic manicures, follow the aftercare instructions from your nail technician. If you are using regular polish at home, keeping your nails away from long periods of water can also help the manicure last longer. Good basic care matters year-round too — dermatologists recommend keeping nails clean, dry, and trimmed regardless of the design.
If the nails are for a Halloween party, getting them done a day or two before the event gives you time to fix any small mistakes.
Frequently Asked Questions
What are some easy Halloween nail ideas?
Black nails, tiny ghosts, pumpkin accents, spiderwebs, black French tips, and burgundy polish are all simple options. A single accent nail can make a plain manicure feel more festive.
What are cute Halloween nail ideas?
Cute ghosts, mini pumpkins, black cats, pastel Halloween nails, and small Halloween doodles are good choices when you want something playful rather than scary.
What colours are best for Halloween nails?
Black, burgundy, deep red, dark purple, burnt orange, brown, cream, and dark green are popular Halloween colours. Silver and chrome can add a more modern touch.
Can I do Halloween nails on short nails?
Yes. Small ghosts, pumpkins, spiders, French tips, and simple colour combinations can all work on short nails. Smaller artwork usually leaves the manicure looking cleaner.
When should I get my Halloween nails done?
If you need them for a Halloween party or event, one or two days before the event is a practical time. This keeps the manicure fresh while giving you a little time to fix any problems.