How Nail Artists Are Reworking Tortoiseshell for 2026
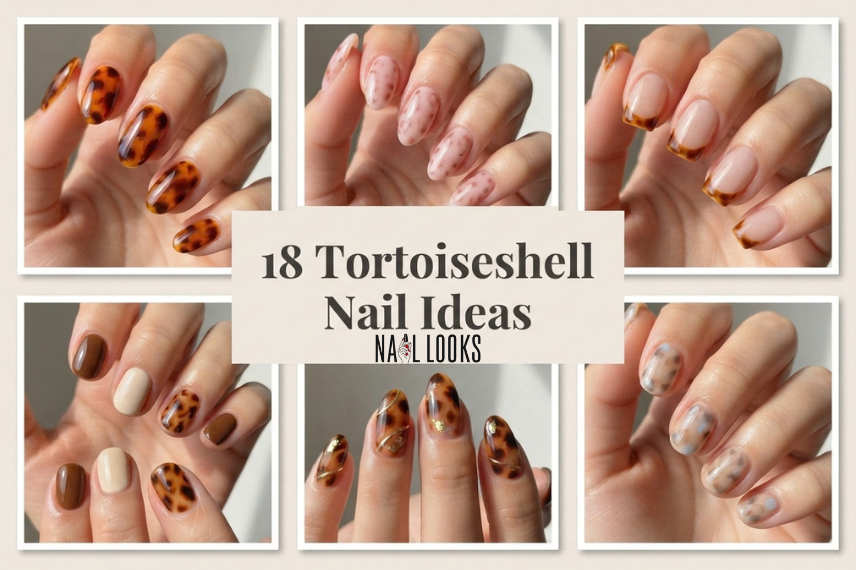
Tortoiseshell has outlasted almost every other animal-inspired print in nail art, and it has less to do with colour and more to do with the pattern’s structure. Unlike a leopard spot or a zebra stripe, which reads the same no matter what shade you paint it, tortoiseshell is really a layering technique. Change the base tone, the transparency, or how the patches sit against each other, and the whole print shifts mood without losing what makes it recognisable.
That flexibility is why this guide splits tortoiseshell into 18 distinct directions instead of one long scroll of brown nails. You’ll find classic and blonde versions, colour-shifted takes, placement changes like French tips and negative space, and a few notes on shape, length, and how to recreate the pattern yourself.
What Are Tortoiseshell Nails?
Tortoiseshell nail art copies the mottled shell pattern once carved from real tortoise and turtle shell, back when that material was used in combs, glasses frames, and jewellery. On nails, it’s recreated with layers of translucent polish, usually amber, honey, and deep brown, dragged and blended over each other before they fully set.
What separates it from a flat brown manicure is the irregularity. The patches should overlap unevenly, with some areas nearly opaque and others letting the base colour show through. A tortoiseshell design that looks too clean or symmetrical usually reads as a brown marble effect instead of the real thing.
18 Tortoiseshell Nail Ideas to Try in 2026
1. Classic Amber Tortoiseshell
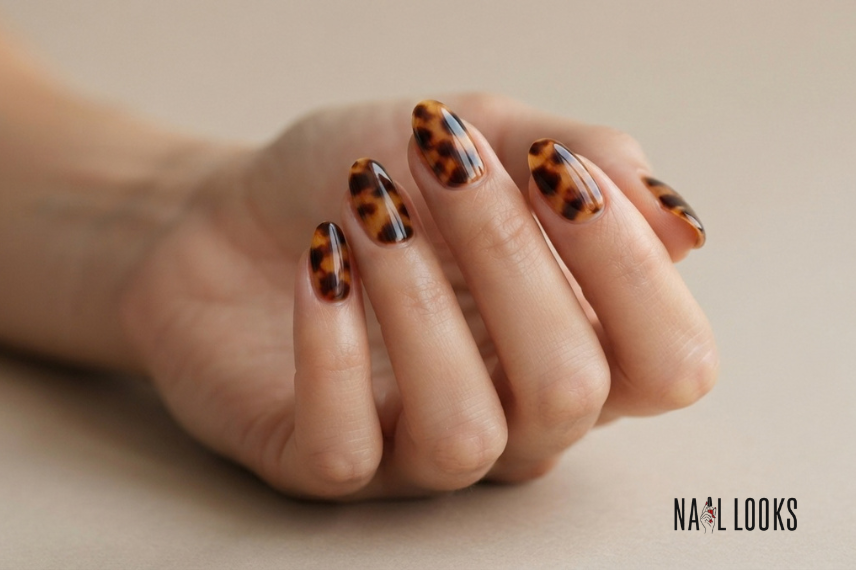
This is the reference point for the whole trend: warm amber and honey tones layered under deep brown and near-black patches, finished with a high-gloss top coat. The gloss matters here, since it’s part of what makes the layered polish look like it has real depth rather than sitting flat on the nail. A full set in this palette works as a stand-alone manicure without any other nail art added.
2. Blonde Tortoiseshell
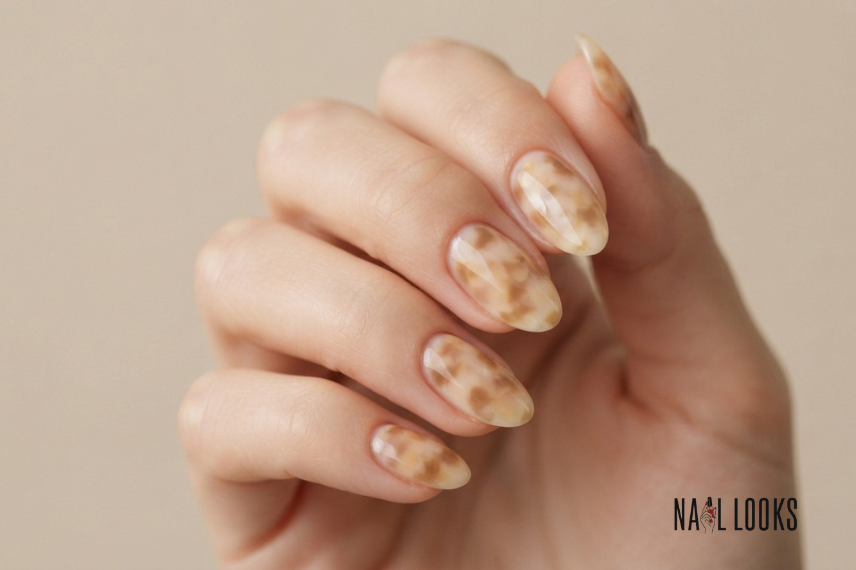
Swap the dark brown and black patches for pale honey and cream, and the same pattern reads noticeably lighter and softer. This isn’t just a lighter shade of the classic version—the contrast between patches drops too, so the whole design feels more subtle at a glance. It works well through spring and summer, when a near-black pattern can feel heavier than the season calls for.
3. Jelly Tortoiseshell
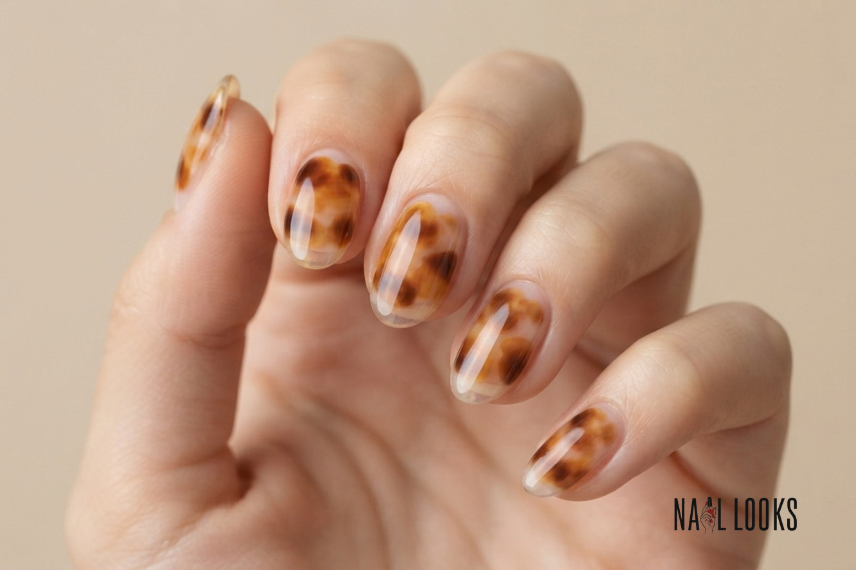
Instead of building the pattern in solid, opaque polish, this version uses sheer, jelly-finish colours layered over a clear or barely tinted base. The result looks more like colored glass than painted shell, with a bit of your natural nail visible underneath the pattern. Because the layers are translucent, this version tends to look slightly different depending on how thick each patch is applied, which is part of the appeal.
4. Jewel-Tone Tortoiseshell
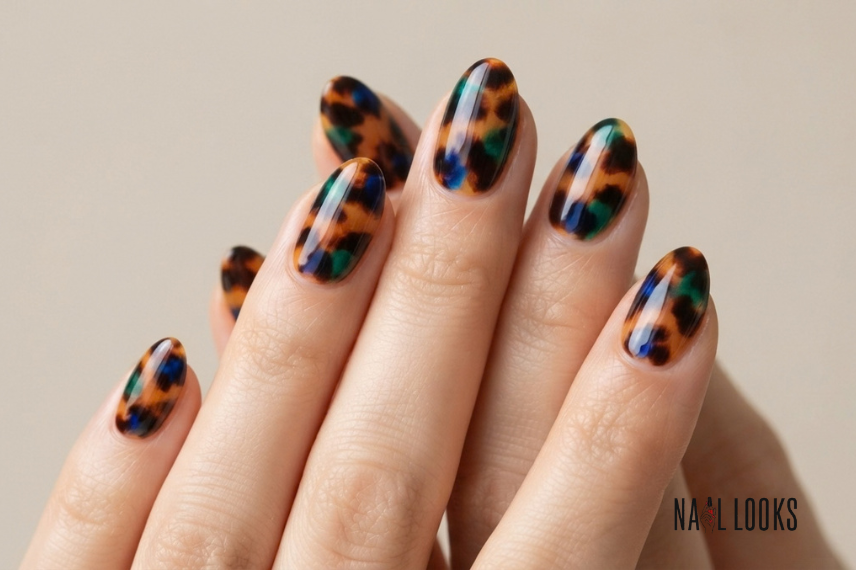
Rather than replacing the classic amber-brown-black base entirely, this version swaps just a few of the patches for a deep jewel tone like emerald or sapphire. The warm and cool colors sit against each other the same irregular way the original pattern does, so it still reads as tortoiseshell rather than an abstract colour-block design. This combination tends to suit evening or occasion nails more than daily wear, since the contrast is bolder than the classic palette.
5. Pink Tortoiseshell
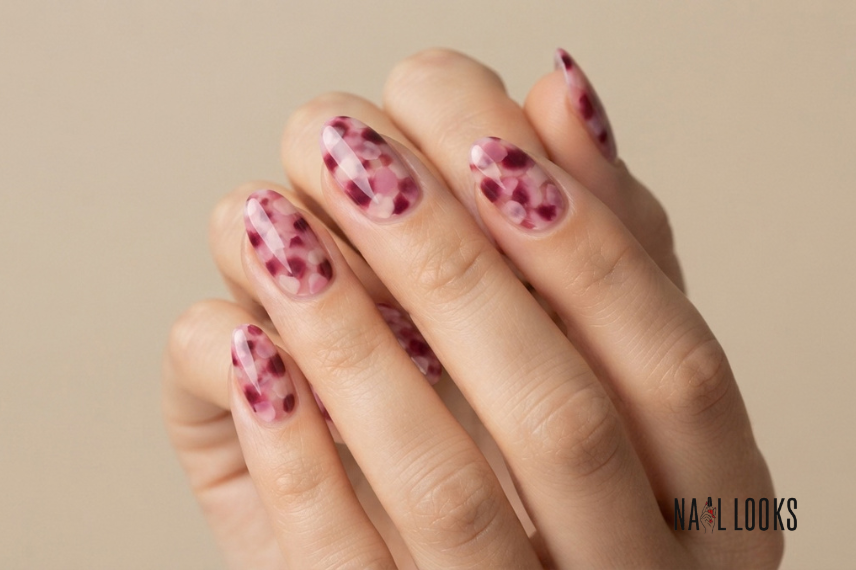
This version rebuilds the entire pattern on a pink-family base instead of amber and brown, using rose, blush, and a deeper berry tone in place of the usual earth tones. Because the whole palette shifts together, it keeps the same layered, uneven structure while reading as warm and romantic instead of autumnal. It’s a useful option if you like the technique but find the classic brown palette doesn’t suit your colour preferences.
6. Cool and Pastel Tortoiseshell
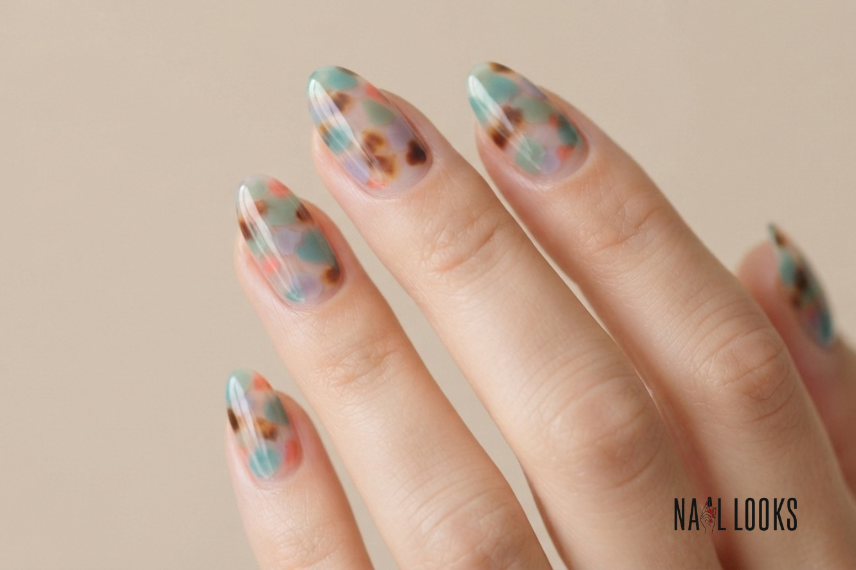
Teal, sage, lilac, and soft coral can all carry the tortoiseshell layering technique the same way amber and brown do, as long as the patches stay irregular and the transparency varies. This version is less about one specific shade and more about proving the technique isn’t locked to warm tones at all. If you want to try a cooler palette, pick two or three shades in the same colour family so the layers still have enough contrast to read clearly.
7. Tortoiseshell French Tips
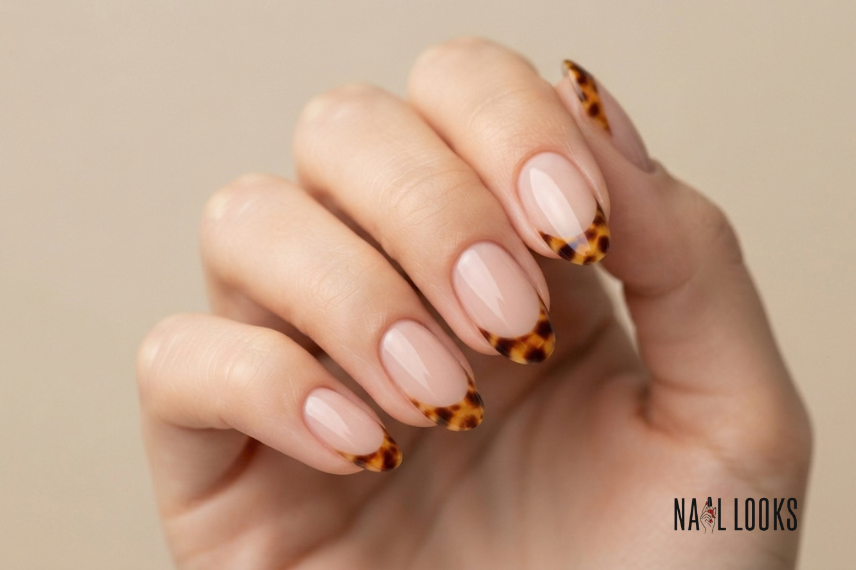
Instead of covering the whole nail, the pattern appears only at the tip, over a bare or nude base. This gives the print a cleaner, more office-appropriate feel, since most of the nail still looks like a simple manicure. It’s also a practical entry point if you’ve never tried tortoiseshell before, since there’s less surface area to blend.
8. Micro Tortoiseshell Tips
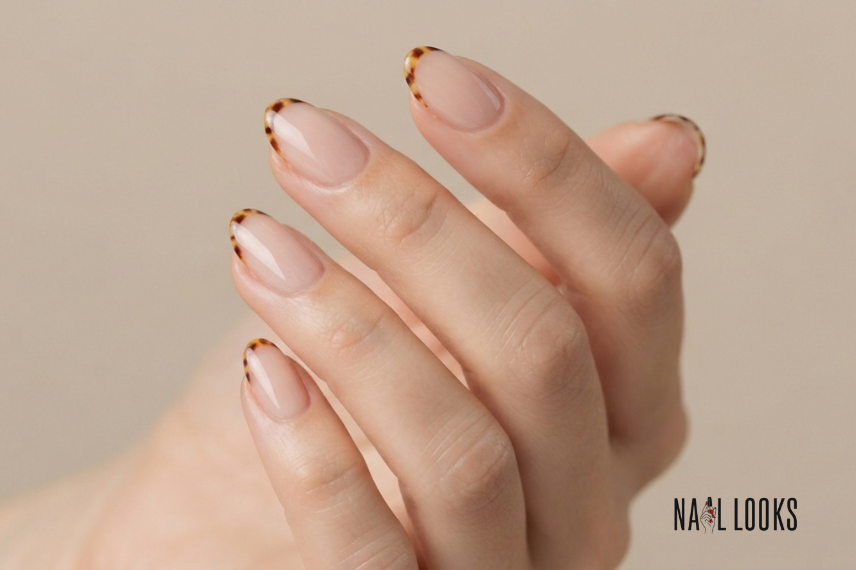
This takes the French tip version a step further, shrinking the pattern down to a thin line right at the edge of the nail instead of a full tip. At this scale, only two or three patches usually fit, so the pattern reads more as a textured line than a recognisable shell print up close. It photographs better than it looks in person, since the detail becomes clearer in a close-up shot.
9. Tortoiseshell Border
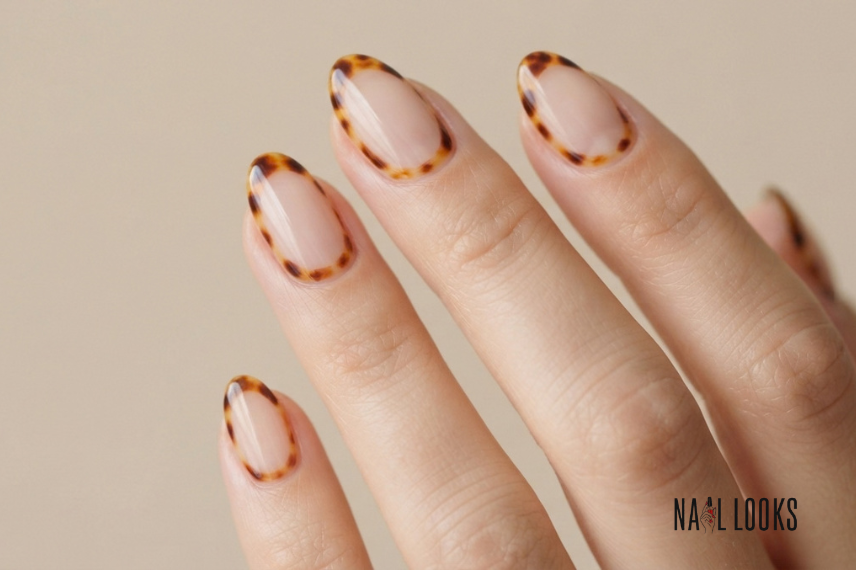
Here the pattern traces just the outer edge of the nail, leaving the centre bare or filled with a single solid colour. This uses tortoiseshell as a frame rather than the main event, which shifts the visual weight toward whatever sits in the middle of the nail. It pairs naturally with a plain glossy centre or a small secondary detail, like a dot or a thin line.
10. Tortoiseshell Half-Moon
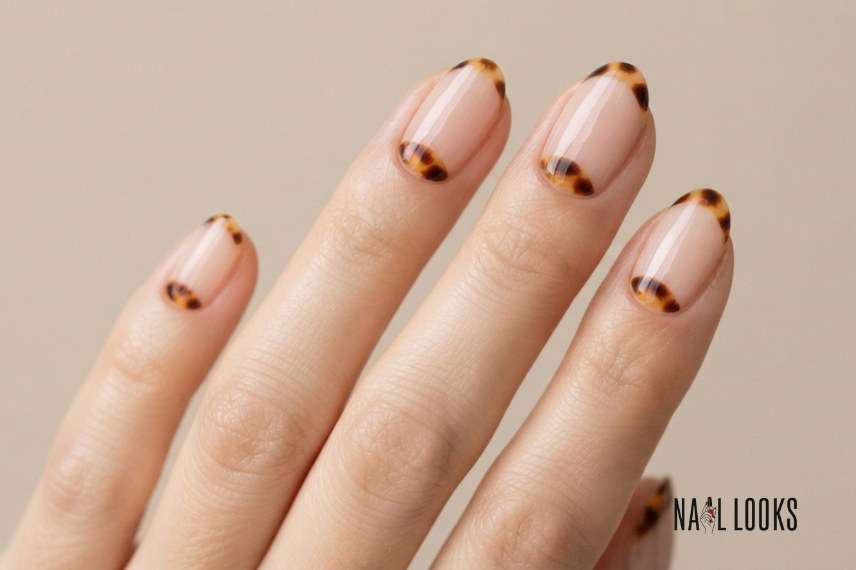
Instead of sitting at the tip, the pattern is confined to the base of the nail near the cuticle, in the shape of a half-moon. This flips the usual French tip placement and puts the detail somewhere it’s seen every time your hand is at rest, not just from the side. It suits shorter nails particularly well, since there’s less length competing for attention.
11. Tortoiseshell Negative Space
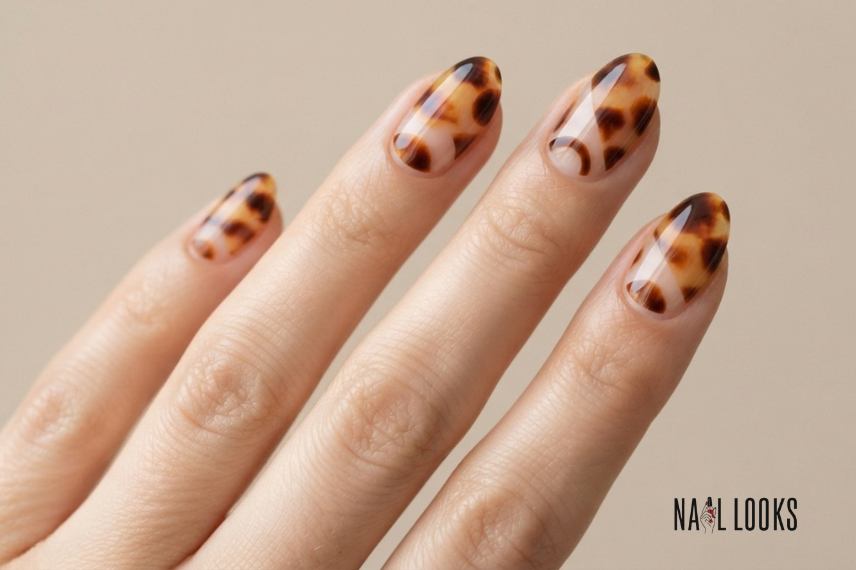
Small bare or clear sections are left within the design, so the pattern only fills part of the nail instead of covering it edge to edge. The negative space breaks up the print and can be shaped as geometric cutouts, a curved line, or a simple gap near the cuticle. This version takes more planning than a full-coverage tortoiseshell nail, since the bare sections need to be mapped out before the polish goes on.
12. Tortoiseshell Accent Nail
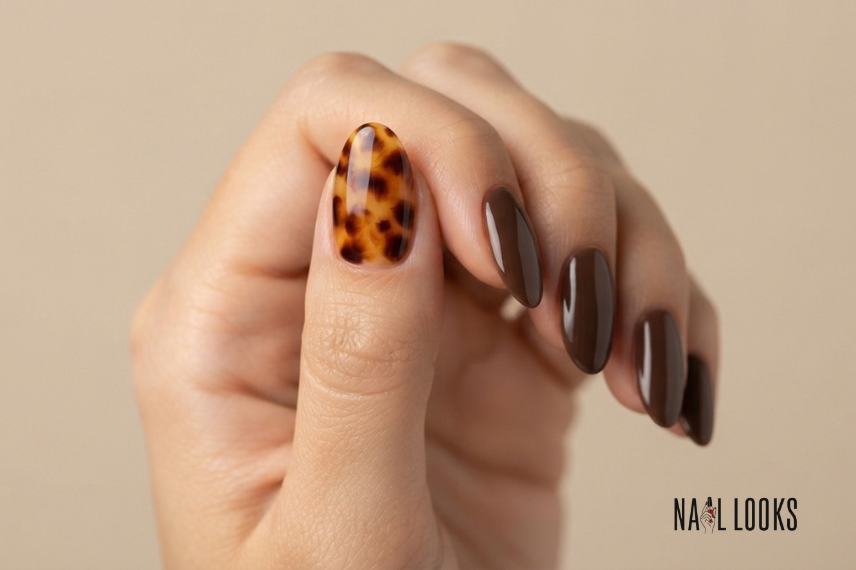
Only one nail per hand carries the full pattern; the rest stay in a plain, coordinating solid colour. This is the simplest way to wear tortoiseshell without a full commitment, and it also makes the accent nail stand out more than it would be surrounded by matching patterns. Choose a solid shade already present in the tortoiseshell palette, like a warm nude or deep brown, so the accent nail doesn’t feel disconnected from the rest of the set.
13. Mix-and-Match Tortoiseshell Set
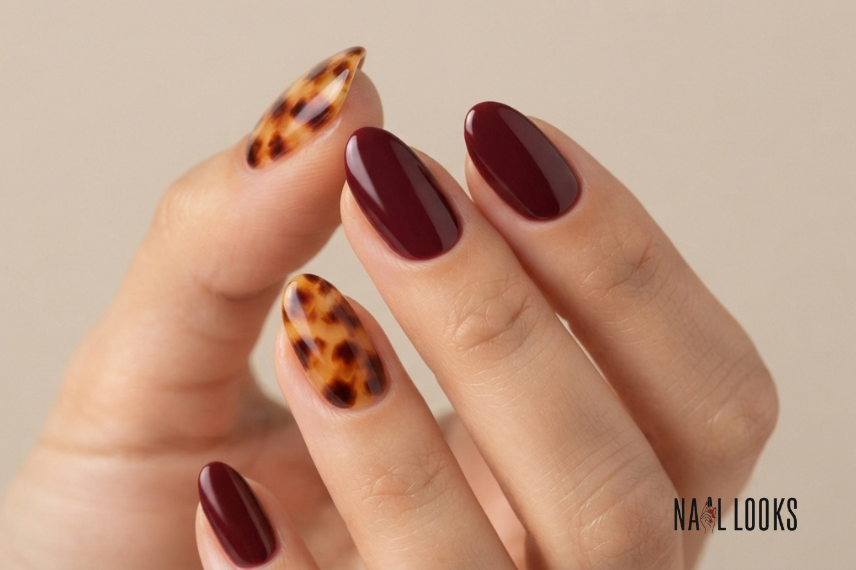
This goes further than a single accent nail: a few nails carry the tortoiseshell pattern while the rest are painted in one saturated solid colour, like sapphire or burgundy, rather than every nail matching. The solid nails and the patterned ones share a colour family, which keeps the set feeling coordinated instead of random. It reads as more deliberate and put-together than a single accent nail, since the pattern is repeated across more than one finger.
14. Tortoiseshell with Chrome Accents
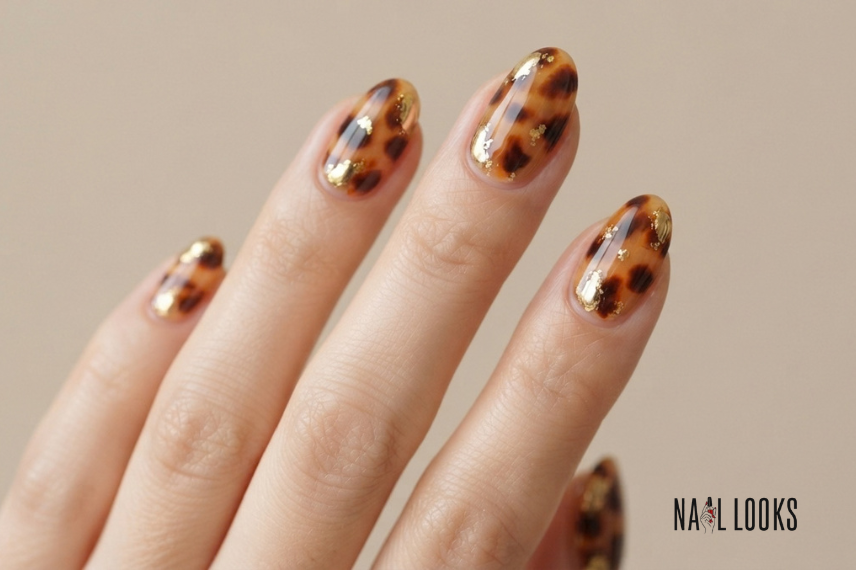
A small amount of chrome powder or foil applied over or between the patches adds a reflective break in the otherwise matte-to-glossy pattern. This works best applied sparingly, over just a few patches rather than the whole nail, so the chrome reads as a highlight instead of covering up the print underneath. It catches more light than a standard glossy top coat, which makes the pattern look less flat under direct light.
15. Tortoiseshell Cat-Eye
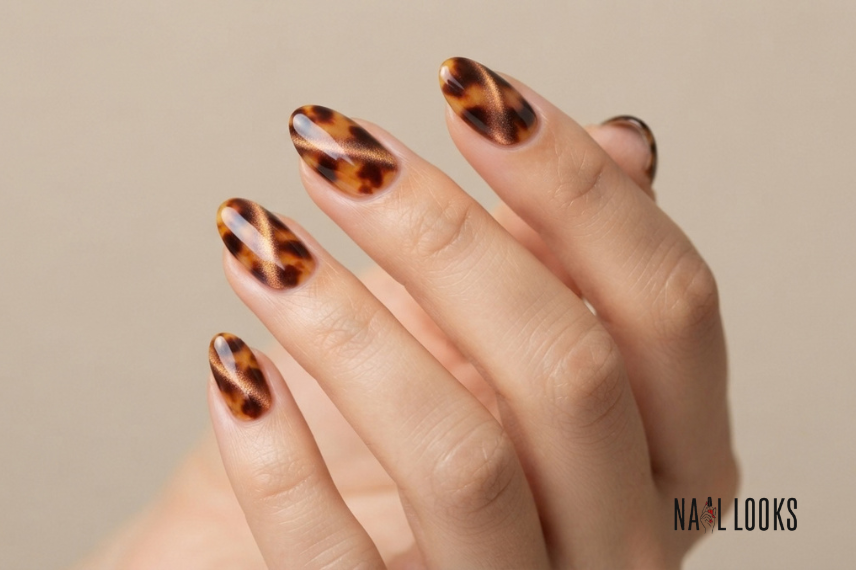
A magnetic top coat pulled over the pattern with a small magnet tool creates a shifting line of shimmer inside the patches, similar to how cat-eye polish works on a solid colour. The effect changes depending on the angle you hold your hand, since the magnetic particles inside the polish move with the tool before it sets. This is one of the more technical versions on this list, since it requires the right magnetic polish formula layered correctly over the tortoiseshell base.
16. Tortoiseshell with a Floral Accent
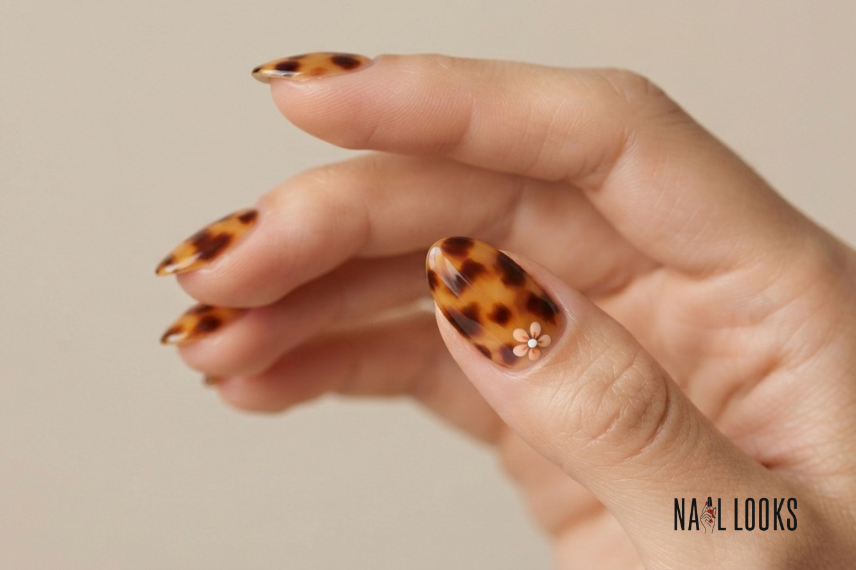
A small hand-painted flower, placed on one nail or in one corner of a patterned nail, softens the otherwise organic, irregular tortoiseshell print. The floral detail works best kept simple, a few petals and a centre dot, so it doesn’t compete with the pattern underneath for attention. This combination tends to suit a design that’s already using tortoiseshell as an accent rather than a full-set commitment.
17. Short Tortoiseshell Nails
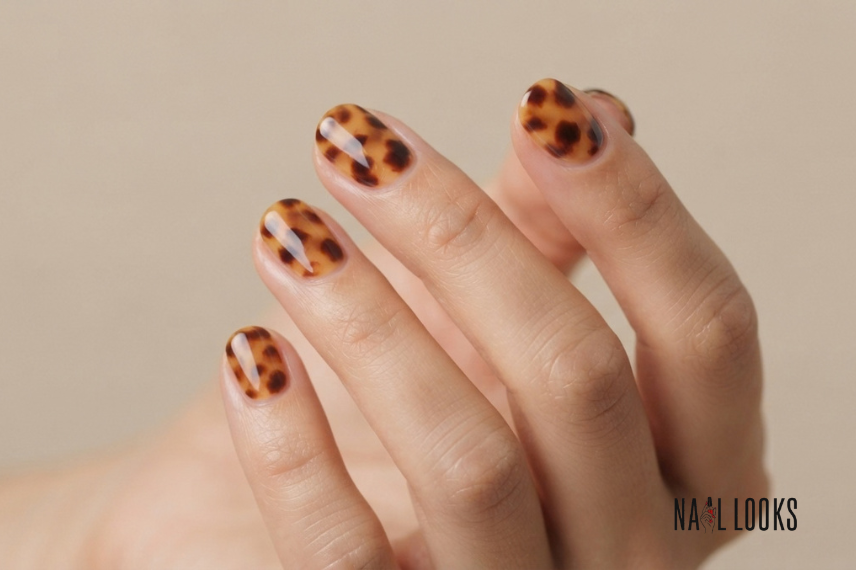
On shorter nails, the pattern needs fewer, larger patches to read clearly, since a full set of tiny, detailed spots gets lost at a smaller scale. This version also holds up better day-to-day, since there’s less surface area exposed to daily wear and less time spent blending the layers in the first place. If you keep your nails practical, ask for the pattern scaled up rather than shrunk down to match the original reference photo.
18. Press-On Tortoiseshell
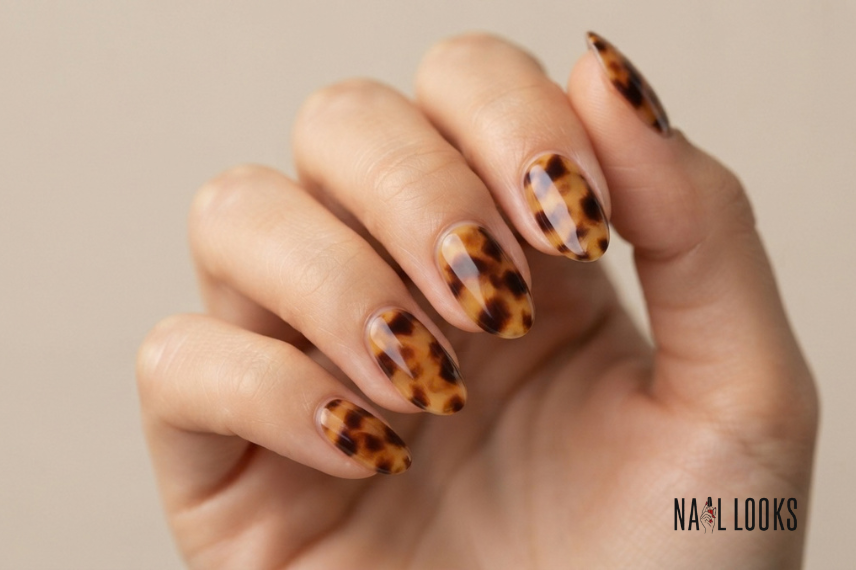
Pre-made press-on sets let you try the pattern without painting it freehand, which matters for a technique that depends on blending wet polish before it sets. This is a reasonable starting point if you want to see how the pattern looks on your hand before committing to a salon appointment or a full at-home attempt. Quality varies a lot between sellers, so check close-up photos for irregular, overlapping patches rather than a printed, repeating pattern.
How to Create Tortoiseshell Nails at Home
Start with clean, shaped nails and a base coat, then apply a translucent amber or honey polish as your foundation colour. While that layer is still slightly tacky, dab on a second, darker sheer polish in uneven patches, focusing on corners and edges rather than the centre of the nail.
Add a third, near-black or deep brown shade in smaller, irregular spots, dragging a thin brush through the wet polish to blend the edges rather than leaving hard lines. Fewer, larger patches usually look more convincing than many tiny dots, since real tortoiseshell doesn’t repeat in a regular pattern. Seal the whole design with a glossy top coat once everything is fully dry.
The most common beginner mistake is working too slowly, which lets the base layer dry before the second colour goes on, leaving hard edges instead of blended ones. Working on one nail at a time, rather than doing all ten base coats first, gives you more control over the blending window. If freehand blending feels too unpredictable at first, a French tip or accent-nail version gives you a smaller area to practice on before attempting a full set.
For general nail prep and aftercare between sessions, the American Academy of Dermatology’s nail care guidance covers the basics of keeping nails healthy under repeated polish and product use.
Final Thoughts
Tortoiseshell nails don’t have to stick to the classic brown pattern. You can keep the look simple with a French tip or accent nail, switch to pink or pastel shades, or add chrome and cat-eye details for something more eye-catching.
If you’re new to the technique, start with a smaller design before trying a full set. Short nails can work beautifully with larger patches, while longer nails give you more room to play with detailed placements and mixed designs.The beauty of tortoiseshell is that every set can look a little different. Pick the colors, finish, and amount of pattern that fit your style, then make the trend your own.
Frequently Asked Questions
What are tortoiseshell nails?
Tortoiseshell nails are a nail art pattern that copies the mottled look of real tortoise shell, built from layered translucent polish in shades like amber, honey, and dark brown, blended in an irregular, overlapping pattern.
What colours are used for tortoiseshell nails?
The classic palette is amber, honey, and deep brown or black. Pink, jewel tones, and cooler shades like teal or sage also work, as long as the layering stays irregular and there’s enough contrast between shades.
How do you create tortoiseshell nail art?
Layer a translucent base colour, then add darker sheer patches while the previous layer is still slightly tacky, blending the edges rather than leaving hard lines. A thin brush works better than a full nail brush for dragging and blending the smaller patches.
Can you do tortoiseshell nails on short nails?
Yes. Short nails usually look better with fewer, larger patches instead of a design scaled down from a longer nail, since tiny details get lost at a smaller size.
Are tortoiseshell French tips easier to do than a full set?
Generally, yes. French tips only need the pattern applied to a small section of the nail, which makes blending easier to control than covering the entire nail plate.